

SFS2X Docs / ExamplesGodot / lobby-basics
» Lobby: Basics
» Overview
This tutorial is the first in a series of three in which we lay the foundations for a lobby application to be used as a template in multiplayer game development. A lobby is a staging area which players access before joining the actual game. In a lobby, users can usually customize their profile, chat with friends, search for a game to join or launch a new game, invite friends to play and more.
This first example of the series shows the basic structure of a multiplayer game, divided into three scenes: Login, Lobby and Game. The Login scene is where the connection to SmartFoxServer is established and login performed. The Lobby scene is the core of the example, where active games can be joined as either player or spectator, or a new game can be launched. Finally, the Game scene acts as a placeholder for an actual game, but it also shows how to implement an in-game chat.
In this document we assume that you already went through the Connector tutorial. That's where the connection and login process is explained in great detail, also mentioning HTTP tunneling and protocol encryption. Those two features have not been implemented in this example and the next ones, to make the C# code lighter and focus on the lobby features implementation.
>> DOWNLOAD the source files <<
» Setup & run
In order to setup and run the example, follow these steps:
- unzip the examples package;
- launch Godot, click on the Import button and navigate to the SFS_LobbyBasics_GD4 folder;
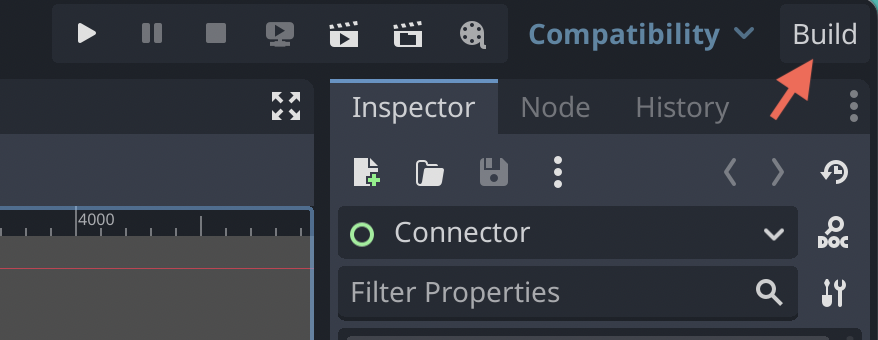
- click the Build button in the top right corner of the Godot editor before running the example.
The client's C# code is in the Godot project's res://scripts folder, while the SmartFoxServer 2X client API DLLs are in the res:// folder.
» Introduction to code
The code for this example is divided into multiple classes contained in the res://scripts folder. The folder contains three <name>GlobalManager scripts which are attached to the control nodes in their respective scenes.
All managers are basic Godot C# scripts implementing the _Ready, _Process and _Notification methods where needed. They also contain the listeners for the events fired by UI components (i.e. buttons), some helper methods and the listeners for SmartFoxServer's client API events.
There is also a script called GlobalManager which is a singleton class, and holds a reference to the SmartFox class instance to share the client-server connection among the project's multiple scenes.
» The shared connection
Unlike the basic Connector example, the approach we followed in developing this and the next examples is to separate the logic into three scenes. This largely simplifies the scene hierarchy and gives each scene manager its own responsibilities, as outlined in the tutorial's overview. However each scene can't be totally standalone, because they all need to interact with SmartFoxServer to accomplish their own tasks and we want the client to establish a single communication channel.
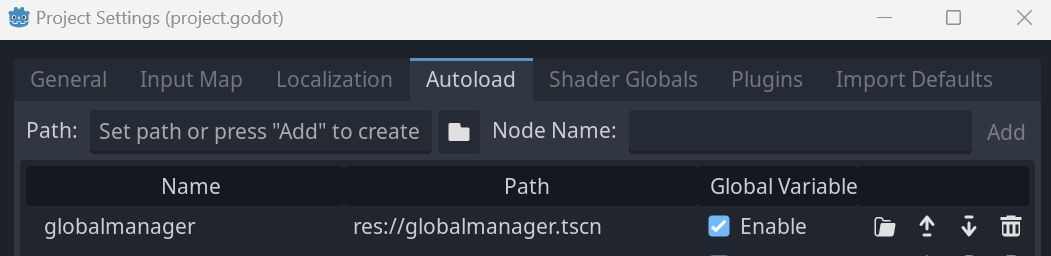
In order to achieve this we use a singleton class we called GlobalManager, which keeps a reference to the only instance of the SmartFox class used by all scenes to communicate with the server (the private sfs field). This script is attached to a control node in a separate scene globalmanager.tscn, and has been added to the autoload tab in project settings, allowing it to be available to all scenes within the project.
The singleton also takes care of triggering the network events processing in its implementation of the _Process() method, as required by the thread safety mechanism implemented and described in the previous tutorial.
	public override void _Process(double delta)	{
		// Process the SmartFox events queue
		if (sfs != null)
			sfs.ProcessEvents();
	}
One more important callback implemented by our manager is the _Notification(), which makes sure a disconnection from SmartFoxServer is always executed on quit. This is strongly recommended because an active network socket during the quit process can cause a crash on some platforms. Additionally, when inside the Godot Editor, stopping playmode doesn't interrupt the internal threads launched by the SmartFox API, which may lead to unwanted issues. Forcing a disconnection ensures that all threads are stopped as appropriate.
	public override void _Notification(int what)
	{
		if (what == NotificationWMCloseRequest)
		{
			if (sfs != null && sfs.IsConnected)
				sfs.Disconnect();

			GD.Print("Application Quit");
		}
	}
The GlobalManager class provides the methods needed to access an existing SmartFox instance or create a new one (using TCP socket or WebSocket communication). Note that when a new instance is created, the manager adds its own handler of the CONNECTION_LOST event: whenever a disconnection is detected, the manager takes care of switching to the initial Login scene, where a warning is also displayed (unless the disconnection was done on purpose by calling the SmartFox.Disconnect() method). This is useful to avoid being forced to handle the disconnection event in every scene.
» Scenes basic behavior
In this example there are three main scene files, login, lobby, and game. They each reference the globalmanager scene singleton class, where the connection to SmartFoxServer is made available to all scenes as described in the previous section.
	public override void _Ready()
	{
		global = (GlobalManager)GetNode("/root/globalmanager");
	}
The OnConnectionLost() method is called when a scene is closed to move to another scene or the game is ended. The method makes sure all the SmartFoxServer client event listeners added by the scene being closed are removed by calling the abstract RemoveSmartFoxListeners() method, which must be implemented by all scene controllers.
	private void OnConnectionLost(BaseEvent evt)
	{
		// Remove SFS listeners
		RemoveSmartFoxListeners();
	}
NOTE
Before loading a new scene, it is very important to remove all the SFS2X event listeners added by the current scene. Otherwise events generated in the next scene could trigger the handlers in the previous scene, with possible unwanted side effects and memory leaks.
Another task common to all scenes loaded while a connection is already available (in other words the Lobby and Game scenes) is to retrieve the reference to the SmartFox instance from the GlobalManager singleton. They need it to add their own SmartFoxServer event listeners and to interact with the server, as discussed in the previous section. This is accomplished in their own _Ready callbacks, together with other stuff specific to each scene.
	public override void _Ready()
	{

		global = (GlobalManager)GetNode("/root/globalmanager");
		sfs = global.GetSfsClient();

		// Add event listeners
		AddSmartFoxListeners();

		...
	}
» Connection and login
The Login scene is in charge of the connection and login process.
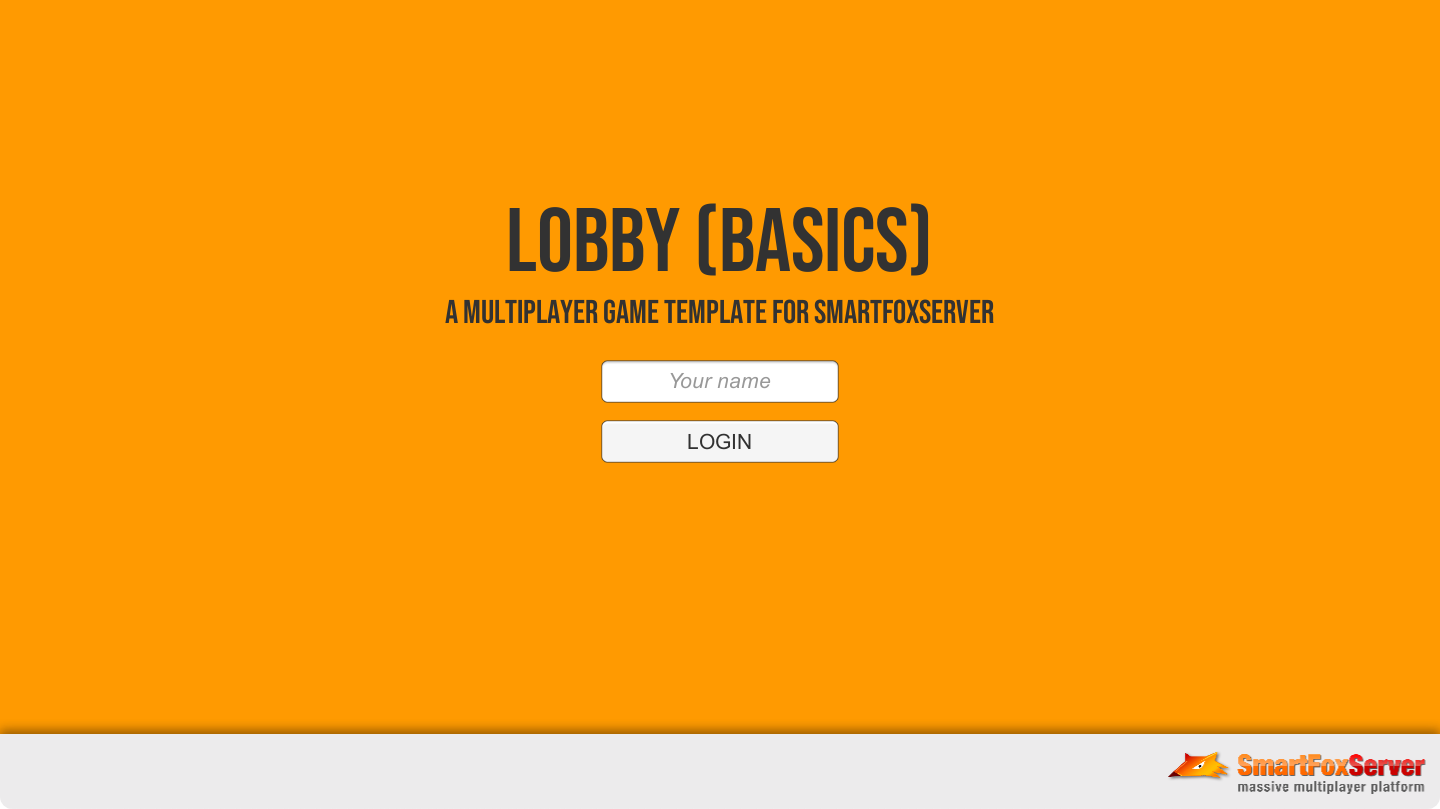
This scene is for the most part borrowed from the Connector example; the steps it executes are:
- The user submits their name.
- The SmartFox class is instantiated and configured according to Godot's build target and according to the parameters set in the Inspector panel.
- The relevant event listeners are added and the connection is attempted by calling the SmartFox.Connect() method.
- Upon successful connection, the login in the Zone set in the configuration is attempted by sending the Login request through the SmartFox.Send() method. Remember that, for sake of simplicity, all examples do not feature user credentials validation (check this recipe for more information).
- Upon successful login, the main view is displayed.
You will notice a few differences in the current example. Check the Connect method: the SmartFox instance is requested to the GlobalManager singleton instead of creating it directly. Also, the connection configuration involves less parameters: we removed the settings relative to protocol encryption and HTTP tunneling, as those features are not relevant to the scope of the example.
	private void Connect()
    {
        GD.Print("Attempting connection to SFS2X...");

        // Clear any previour error message
        errorText.Text = "";

        // Set connection parameters
        ConfigData cfg = new ConfigData();
        cfg.Host = host;
        cfg.Port = tcpPort;
        cfg.Zone = zone;
        cfg.Debug = debug;

        if (OS.GetName() == "Web")
        {
            cfg.HttpPort = httpPort;
        }
        // Initialize SmartFox client
        if (OS.GetName() == "Web")
        {
            sfs = new SmartFox(UseWebSocket.WS_BIN);
            GD.Print("Web Build");
        }
        else
        {
            sfs = global.CreateSfsClient();
        }

		...
	}
Having removed the possibility to enable protocol encryption, the CONNECTION event listener becomes much more straightforward (the login is attempted directly) and the OnCryptoInit event handler is not needed anymore.
Finally, in the OnLogin event listener, instead of switching views available in the same scene, the Lobby scene is loaded. This causes the Login scene to be destroyed (but not the GlobalManager singleton!) and all its SmartFox event handlers to be removed.
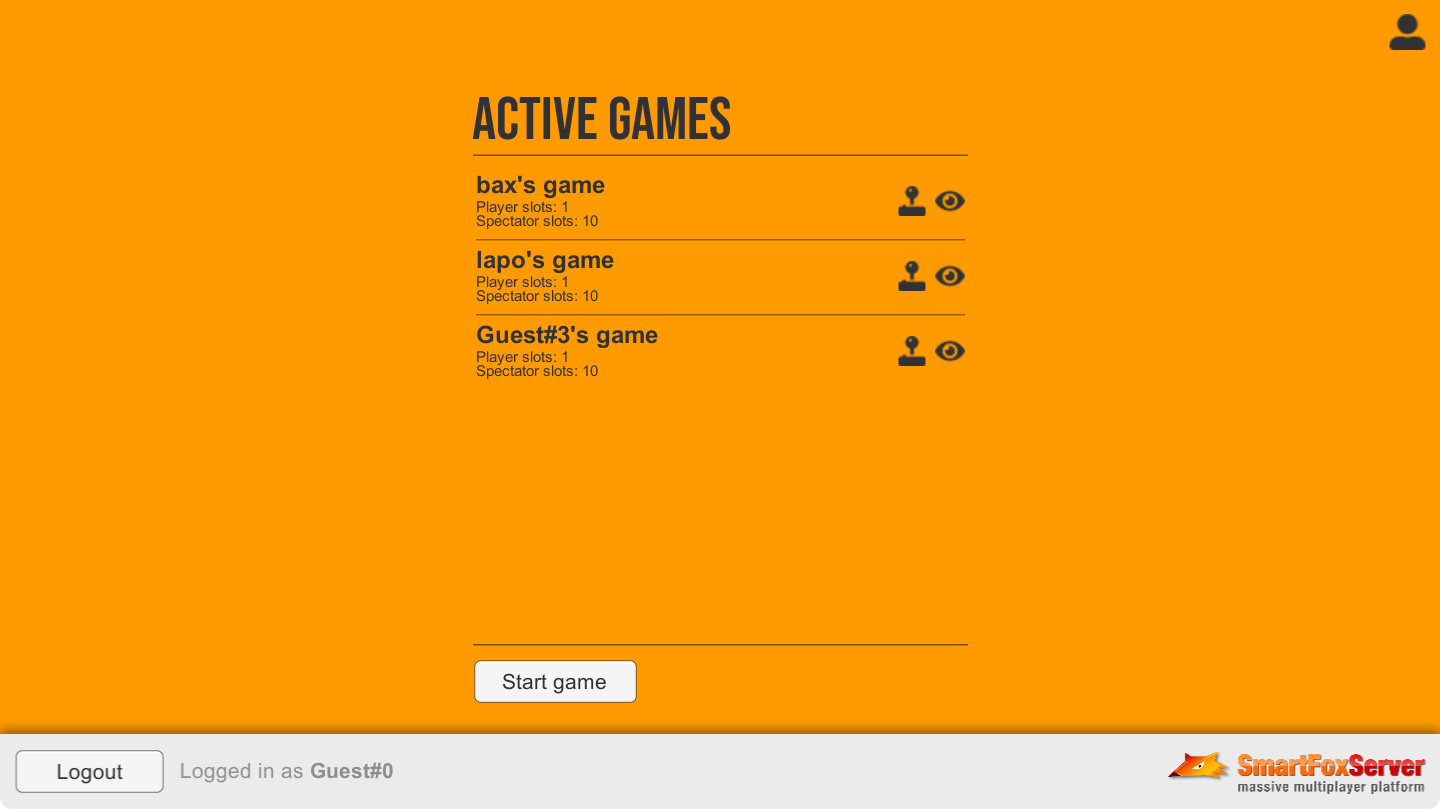
» Joining a Game Room
The Lobby scene is the core of this example, and it is where the user can launch a new game or join an existing one. Here they can also access a User Profile panel by clicking the icon at the top, right corner. In this example the panel is mostly a placeholder: actual profile settings will be added in the next examples.
As soon as the scene is loaded, we have to show the user the currently available games they may want to join. In SmartFoxServer, games are represented by Rooms: a Room is where users are grouped to be able to interact with each other. Check the Zones and Rooms architecture document for more information.
We can access the list of Rooms available in the current Zone by means of the SmartFox API's RoomManager class, which is the interface to work with Rooms. Then we can loop through the list to display the Rooms in the UI.
	private void PopulateGamesList()
	{
	   // Initialize list
		if (gameListItems == null)
			gameListItems = new Dictionary<int, GameListItem>();

		// For the game list we use a scrollable area containing a separate prefab for each Game Room
		// The prefab contains clickable buttons to join the game
		List<Room> rooms = sfs.RoomManager.GetRoomList();

		// Display game list items
		foreach (Room room in rooms)
			AddGameListItem(room);

	}
In this example each Room in the list is represented by an instance of the Game List Item scene which has also been added to the autoload tab allowing it to be accesssed an loaded into other scenes. Note that before creating it, some checks are executed on the Room properties: Rooms not flagged as game (see below), or flagged as hidden, or private (password-protected) are all skipped. This is only for learning purpose, as none of those features (non-game/hidden/private Rooms) are used in this example.
We'll go back to the Rooms list in a little while. Now let's explore how the user can start a new game. When the Start game button is clicked in the UI, its click listener is executed. This is where the Room representing the new game is configured and its creation is requested to the server.
	public void OnStartGameButtonClick()
	{
		// Configure Room
		RoomSettings settings = new RoomSettings(sfs.MySelf.Name + "'s game");
		settings.GroupId = GAME_ROOMS_GROUP_NAME;
		settings.IsGame = true;
		settings.MaxUsers = 2;
		settings.MaxSpectators = 10;

		// Request Room creation to server
		sfs.Send(new CreateRoomRequest(settings, true));
	}
In this simple example, a minimal subset of Room properties is configured (all Room settings are described in detail in the Room architecture document):
- the Room name is passed to the RoomSettings constructor; it must be unique in the Zone, so to achieve this we generate it starting from the user name (which is unique in the Zone — this is a good approach unless the user is allowed to create multiple Rooms, which is not the case in our example);
- we assign the Room to a Group called "games";
- the IsGame flag is set to true because we want this to be a Game Room;
- the maximum number of users is set to 2 (supposing the Room represents a 2-players game) and we limit the number of game spectators to 10.
When the request is sent, we want the new Room to be joined automatically by the user: this is achieved by passing true as second parameter in the request class constructor, to instruct SmartFoxServer to do so.
In case an error occurs and the Room can't be created (for example because the Zone reached the maximum number of Rooms it is configured for), the ROOM_CREATION_ERROR event is fired and we can handle it showing a warning in the UI.
When a Room is created, and similarly when it is destroyed (because all users left it and it is empty), all clients need to know this happened, so that they can update the list of available Rooms. In order to do it, we can rely on the ROOM_ADD and ROOM_REMOVE events.
In the respective event handlers, when a Room is created we can add a new list item to the UI (just like we did in the loop right after entering the Lobby scene), and when it is removed we have to look for the corresponding list item and destroy it.
Other than the Room name, the list item shows how many player and spectator slots are still available for users to occupy by joining the Room. This can be done by clicking one of the two icons on the right: the joystick to join the game as a player and the eye to join it as a spectator. In order to keep the slot counters updated we rely on the USER_COUNT_CHANGE event, whose listener updates the list item state. In case all player and/or spectator slots are occupied, the corresponding icon is disabled to prevent a join attempt (which would fail anyway).
When a Room is joined, whether automatically after its creation or by selecting it in the list, the ROOM_JOIN event is fired. The OnRoomJoin event handler loads the Game scene and the Lobby scene is destroyed (which, remember, removes all its SmartFox event handlers).
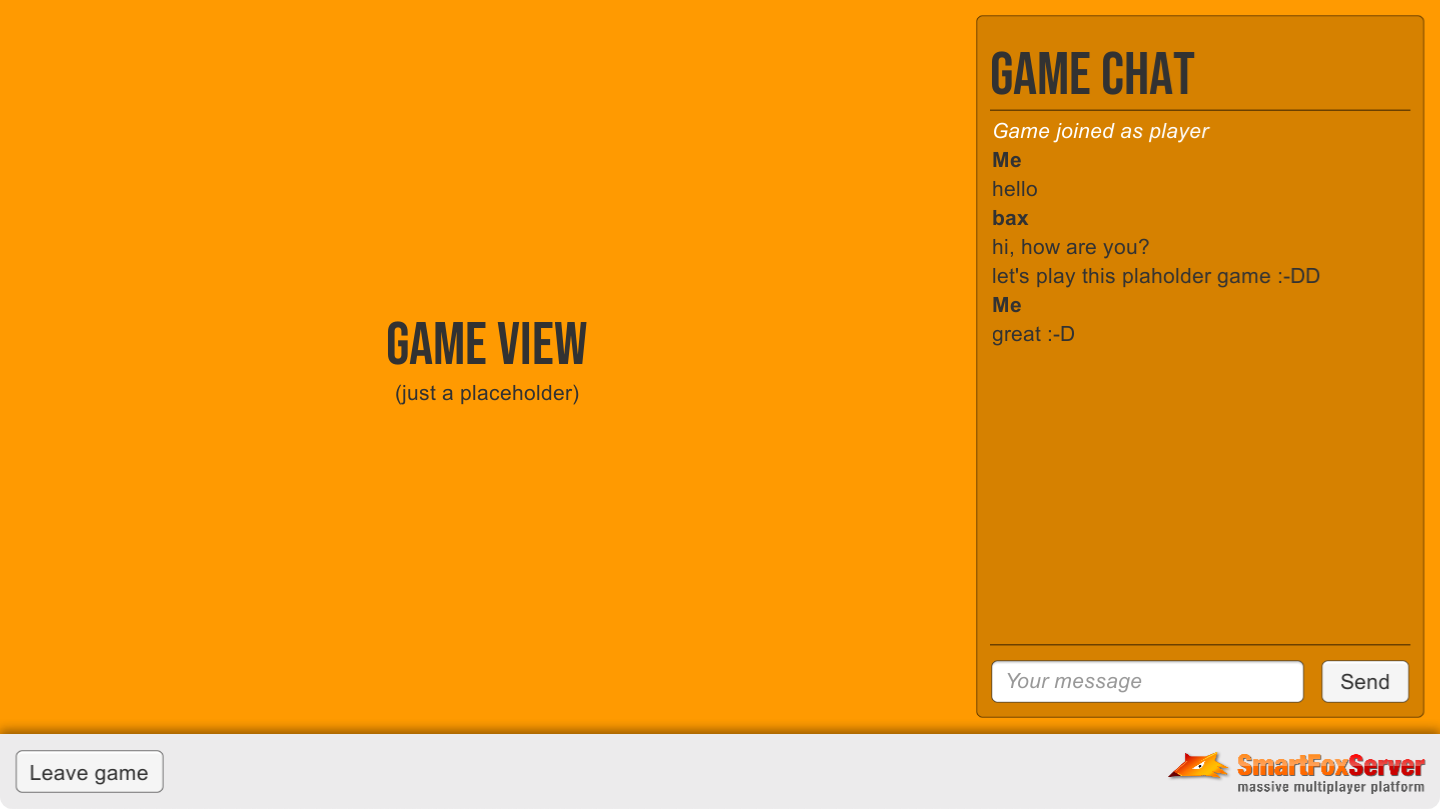
» Exchanging in-game chat messages
As mentioned in the overview, the Game scene is just the mock-up of a game; we will show later in this tutorials series for Godot how to create an actual game and its logic. Nonetheless this is a good place to showcase a quite common feature in multiplayer games, in particular turn-based ones: in-game chat.
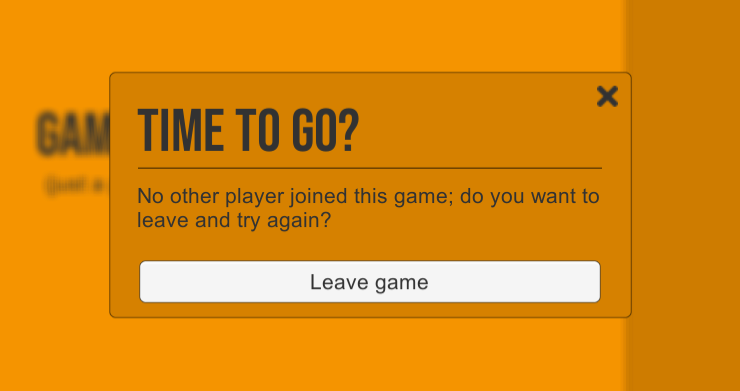
Before delving into the chat implementation, note that the gamemanager's _Ready() method checks if the user is a player (not a spectator) and if they are the first one who joined the Room. If yes, a sort of timeout is activated: after 20 seconds (counted down by the _Process() method) during which no other player joined the Room, a popup panel is displayed suggesting the user to leave the Room.
In this project this is not particularly useful, but it will be in more advanced use cases: for example when the user invited some of their buddies to join a private game and they refused, or the match-making system couldn't locate other users to invite to play.
Whether the user accepts to leave the game when prompted, or they click on Leave game button available in the scene, the Game Room can be left by sending the LeaveRoom request to the server. After sending it, we can immediately switch back to the Lobby scene.
	public void OnLeaveButtonClick()
	{
		// Leave current game room
		sfs.Send(new LeaveRoomRequest());

		// Return to lobby scene
		RemoveSmartFoxListeners();
		GetNode<Control>("Leave Panel").Hide();
		GetTree().Paused = false;
		GetTree().ChangeSceneToFile("lobby.tscn");
	}
Users entering and leaving the Room is notified to all clients by means of the USER_ENTER_ROOM and USER_EXIT_ROOM events, whose handlers in this example simply print a message in the chat panel. Actually this is not the most useful way to use those events: in a real-case scenario they are essential to make the game logic act according to the number of players currently in the Room (i.e. wait for more players to join, or start the game when a minimum number of players is reached, or pause it when someone left, or add/remove users from an in-game user list, etc).
Speaking of chat panel, this is where the in-game chat actually takes place. With an actual game missing, this is the heart of the scene, but it could also be the core of a chat application entirely.
Exchanging chat messages is the most basic functionality provided by SmartFoxServer: users connected to the same Zone can send public messages to all the other users in the same Room, private messages to specific users (regardless the Room they are in) and another kind of private messages (called buddy messages) if the Buddy List system is enabled. SmartFoxServer provides additional features to build a complete chat system, like moderation controls, anti-flood filtering capabilities and an advanced words filter which supports regular expressions and white-list/black-list modes.
In this example we implemented a very basic public chat, allowing both players and spectators exchange public messages. The UI features a scrollable area for the messages, an input field and a Send button. Whether the user clicks on the button or hits the enter key after typing their message, the respective events cause the controller's SendMessage() method to be called. Here, an instance of the PublicMessage request is passed to the SmartFox.Send() method.
	private void SendMessage()
	{
		if (messageInput.Text != "")
		{
			// Send public message to Room
			sfs.Send(new PublicMessageRequest(messageInput.Text));

			// Reset message input
			messageInput.Text = "";
			messageInput.Select();
		}
	}
SmartFoxServer receives the request and delivers the message to all users in the Room, including the sender, by means of the PUBLIC_MESSAGE event, for which we registered an handler when the scene was loaded.
The handler extracts the sender name and message from the event parameters and prints the message in the chat panel.
	private void OnPublicMessage(BaseEvent evt)
	{
		User sender = (User)evt.Params["sender"];
		string message = (string)evt.Params["message"];

		// Display chat message
		PrintChatMessage(message, sender != sfs.MySelf ? sender.Name : "");
	}

	private void PrintChatMessage(string message, string senderName)
	{
		// Print sender name, unless they are the same of the last message
		if (senderName != lastSenderName)
		{
			chatTextArea.Text += "[b]" + (senderName == "" ? "Me" : senderName) + "[/b]\n";

		}

		// Print chat message
		chatTextArea.Text += message + "\n";

		// Save reference to last message sender, to avoid repeating the name for subsequent messages from the same sender
		lastSenderName = senderName;

	}
You can now proceed to the next example in this Godot series to learn new features of SmartFoxServer.
» More resources
You can learn more about the SmartFoxServer concepts discussed in this example by consulting the following resources: