

SFS2X Docs / ExamplesJS / tris
» Tris (Tic-Tac-Toe)
» Overview
The Tris example shows how to create a fully featured multiplayer version of the well known "Tic-Tac-Toe" game using SmartFoxServer 2X.
The following game flow is implemented.
- Users log in and by default join a Room called "The Lobby"; this is where users can meet and chat before they start or join a game.
- A user creates a Room where he can play the tic-tac-toe game against another user; as soon as the game is created, the user joins it and waits for the second player.
- When the second player joins the game (by selecting it in the list of the lobby view), the game starts. Users can also join as spectators, in which case the game still waits for a player, if not yet started.
- The game controls the player's turn and after every move it checks if there's a winner.
- The game ends when no more moves are available or one of the player makes a row of three pieces; at the end of the game players can either start a new game or go back to the lobby Room.
This example shows how to create a SmartFoxServer Room of type "game". Game Rooms are aimed at representing games (or matches) as they can contain two different types of users: players and spectators. A Game Room also provides player indexes: each user joining the room is automatically assigned a unique player index which facilitates the tasks of starting and stopping the game (spectators are not indexed instead).
Furthermore, this game accepts spectators, who receive all game events, can chat with the players but don't actually play. A spectator can be turned into a player by sending a dedicated request: if at least one user slot is available the spectator is turned into a player and receives his own player index. Of course an event is also fired to the other clients to notify the change.
This example shows the spectator-to-player switch feature of SFS2X: spectators are allowed to join the game and become players in case one of the current players leaves the match (before or after its conclusion).
The Tris example also features a server-side Extension which is in charge of handling the game logic, as opposed to keeping the logic on the client side only. In general, using a server side Extension is the most flexible and secure option when developing a multiplayer game. Even if SmartFoxServer provides powerful tools for developing application logic on the client, this approach can be limiting when your games become more complex. Also keeping sensitive game data on the server-side allows overall better security from hacking attempts, cheating, etc.
The server side Extension that handles the game is dynamically attached to the Room representing the game started by a player. The Extension sends all game events to the client, allowing us to split the tasks between server and client: all the game logic runs on the server, while the client is responsible of the game rendering only.
>> DOWNLOAD the source files <<
» Running the example
In order to run the example, follow these steps:
- copy the
 /deploy/extensions/Tris-JS folder to your SFS2X installation folder, under /SFS2X/extensions;
 - make sure your SmartFoxServer 2X installation contains the BasicExamples Zone definition;
- start SmartFoxServer 2X (v2.13 or later is required);
- make sure WS protocol is enabled in SFS2X configuration (read Server setup in the intro);
- open the /deploy/client/index.html file in a browser (Firefox recommended).
» Extension
The game features a server side Extension, as described in the overview. The Extension is available in two languages: Java and JavaScript.
Step 1 above shows how to deploy the JavaScript Extension, which is the default one for the example.
You can access its code by simply opening the files in the Tris-JS folder with a text editor.
In order to use the Java Extension, in step 1 copy the ![]() /deploy/extensions/Tris folder to the server's /SFS2X/extensions folder. Then follow the instructions in the next paragraph.
/deploy/extensions/Tris folder to the server's /SFS2X/extensions folder. Then follow the instructions in the next paragraph.
You can access its source code by creating a new project in your Java IDE of choice as described in the Writing the first Java Extension document of the Java Extensions Development section. Copy the content of the ![]() /source/java-extension/src folder to your Java project's source folder.
/source/java-extension/src folder to your Java project's source folder.
» Client code highlights
In order to speed up development and provide a refined user interface, this example makes use of the jQWidgets UI Toolkit. The widgets are distributed for learning purposes only and you are not entitled to use them in a commercial product. If needed, please visit the jQWidgets website to acquire a proper license. The example also uses the free createJS framework, to deal with the HTML5 Canvas.
The <head> tag of the main index.html file links the mentioned libraries and their dependancies, the SmartFoxServer API library and the external main.js and TrisGame.js files, containing the boilerplate code (connection, login, Room joining, etc) and the actual game logic respectively.
As already discussed in previous tutorials, the controls and widgets defining the user interface are configured right after the page is loaded. The <div id="main"> tag contains the three sub-divs representing the login, lobby and game views.
At the very beginning of the main.js file a few constants are defined, among which you will find EXTENSION_ID and EXTENSIONS_CLASS. These indicate the identifier and main class of the server side Extension containing the game logic (player turns, victory condition, etc). By default the example uses the JavaScript version of the Extension. You can switch the constants with those right below to use the Java Extension, provided you installed it.
The init() method following the constants is responsible of instantiating and configuring the SmartFox class and display the login view. In order to switch from one view to the other, the setView() method is always called: depending on the connection state, it updates the UI enabling or disabling buttons and other controls, populating the list of Game Rooms and users in the lobby, etc. The view is then actually switched by the switchView() function.
» Join the Lobby
This example is built on the foundations laid out by other examples; in particular the steps to connect, log in and join the lobby Room are essentially the same as those described in the Game Lobby tutorial, so we won't go into details here.
Just like in that example, after entering the lobby you can chat publicly, see the list of available SFSGame Rooms to join and click the Quick game join button to join a Room waiting for one more player. As in this example there's no user profile and Match Expressions associated with the Rooms, the server will just pick the first Room with an available player slot.
In the bottom tab of the sidebar, where users currently in the lobby are listed, it is also possible to chat privately just like we already implemented in the Advanced Chat example. Again, please check the related tutorial to read the details.
» Start a game
In order to start a new tic-tac-toe game, we click on the Start new game button. This shows a simple popup in which you can set the (unique) Room name and choose if the game accepts spectators (and how many). As always this approach is for learning purposes: in a real case scenario all the Room details would probably be set by the system and the Room created immediately.
As soon the Create button on the popup panel is clicked, the onDoCreateGameBtClick() function sends a CreateSFSGameRequest to the server.
	function onDoCreateGameBtClick(event)
	{
		if ($("#gameNameIn").val() != "")
		{
			// Basic game settings
			var settings = new SFS2X.SFSGameSettings($("#gameNameIn").val());
			settings.groupId = GAME_ROOMS_GROUP_NAME;
			settings.isGame = true;
			settings.maxUsers = 2;
			settings.maxSpectators = Number($("#spectatorsIn").jqxNumberInput("val"));

			// Extension
			settings.extension = new SFS2X.RoomExtension(EXTENSION_ID, EXTENSIONS_CLASS);

			// Send CreateSFSGame request
			var isSent = sfs.send(new SFS2X.CreateSFSGameRequest(settings));

			// Close panel
			if (isSent)
				$("#createGameWin").jqxWindow("closeWindow");
		}
	}
The Room is of type SFSGame and it's created just like in the Game Lobby example, with a few differences. For example the game is always public (so there's no code related to invitations) and it has no Matching Expression assigned. But the most important change is that we are asking the server to associate an Extension to the Room, by passing the identifier and main class name using a RoomExtension instance.
This is the server log reporting the Room creation and Extension initialization:
12:23:05,970 INFO [SFSWorker:Sys:3] Extensions - {Tris-JS}: TrisJS Extension init (version 1.0.0)
12:23:05,990 INFO [SFSWorker:Sys:3] managers.SFSRoomManager - Room created: { Zone: BasicExamples }, [ SFSGame: test, Id: 18, Group: games, public: true, minPlayers: 0 ], type = SFSGame
SmartFoxServer automatically joins us in the newly created Room, causing the ROOM_JOIN event to be fired and the onRoomJoin() listener to be executed.
function onRoomJoin(event)
{
trace("Room joined: " + event.room);
// Switch view
if (event.room.name == LOBBY_ROOM_NAME)
{
...
}
else
{
inGame = true;
setView("game", true);
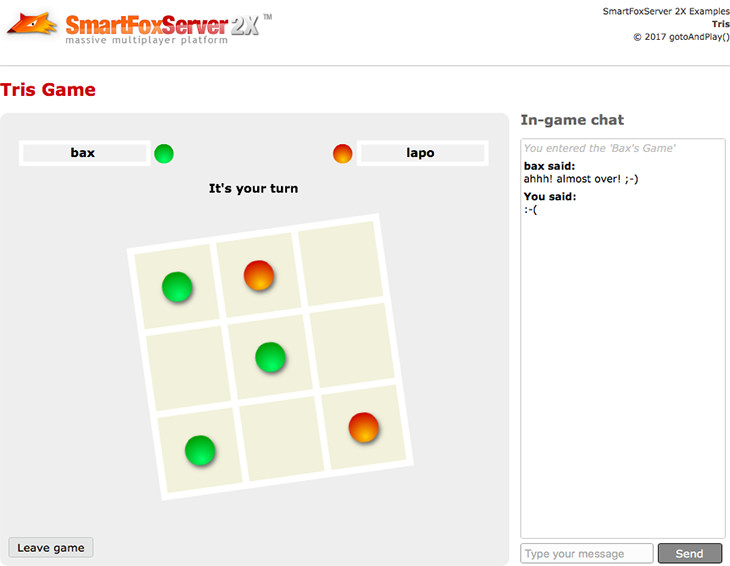
writeToGameChatArea("You entered the '" + event.room.name + "'");
// Initialize the game
initGame();
// Reset roomlist selection
onRoomSelected(null);
}
}
The code above switches the UI to the game view, writes a message in the in-game chat and calls the initGame() function provided by the TrisGame.js file (which contains all the methods and properties specific to the tic-tac-toe game).
	function initGame()
	{
		if (inited == false)
		{
			inited = true;

			// Stage
			canvas = document.getElementById("gameContainer");
			stage = new createjs.Stage(canvas);
			stage.mouseEventsEnabled = true;

			// Ticker
			createjs.Ticker.setFPS(FPS);

			// Board
			buildGameUI();
		}

		createjs.Ticker.addListener(tick);

		gameStarted = false;

		// Remove event listeners before adding again
		// TrisGame should be a separate class, instantiated each time a new game is started
		sfs.removeEventListener(SFS2X.SFSEvent.EXTENSION_RESPONSE, onExtensionResponse);
		sfs.removeEventListener(SFS2X.SFSEvent.SPECTATOR_TO_PLAYER, onSpectatorToPlayer);

		// Register to SmartFox events
		sfs.addEventListener(SFS2X.SFSEvent.EXTENSION_RESPONSE, onExtensionResponse);
		sfs.addEventListener(SFS2X.SFSEvent.SPECTATOR_TO_PLAYER, onSpectatorToPlayer);

		resetGameBoard();

		// Setup my properties
		iAmSpectator = (sfs.mySelf.getPlayerId(sfs.lastJoinedRoom) == -1);

		// Show "wait" message
		var message = "Waiting for player " + ((sfs.mySelf.getPlayerId(sfs.lastJoinedRoom) == 1) ? "2" : "1")

		if (iAmSpectator == false)
			showGamePopUp("wait", message);

		// Tell extension I'm ready to play
		sfs.send( new SFS2X.ExtensionRequest("ready", null, sfs.lastJoinedRoom) )
	}
The first time the initGame() method is executed, it configures the stage on the Canvas object and draws the game UI (see buildGameUI() method): this is made of the board background and player pieces (all nine already on the stage, but set on an empty frame), the player names and icons and the status message.
Then the method:
- adds a listener to the Ticker object from createJS framework, to update the stage continuously;
- removes the previous listeners to SmartFoxServer events used by the game (in case this is not the first time a game is started, to get rid of event handlers added in the last game — this is required because we don't have a TrisGame class to destroy and recreate each time... there's room for some improvement here!);
- adds the listeners to EXTENSION_RESPONSE and SPECTATOR_TO_PLAYER events: the former is the main way used by the Room Extension to send game updates to the client, as we will discuss in a minute; the latter is the confirmation that a user who joined the game as a spectator has been turned into an actual player;
- resets the game board, hiding the player pieces in case a game was played before;
- determines if we joined the game as a spectator; if not, it shows a "wait for opponent" popup message;
- finally it sends an ExtensionRequest to the server with the command "ready" (and no other parameters), to let the Room Extension know that we are ready to play.
Starting with the "ready" one, all commands sent by the game to the Extension are made of the command identifier string, an optional SFSObject containing custom parameters and the target Room (which of course is always the last one we joined).
Join a game (player vs spectator)
When we start a new game, all other users in the lobby are notified through the ROOM_ADD event: the onRoomAdd() listener recreates the list of available game Rooms and the UI is updated accordingly (as discussed in other tutorials, this approach is quite rough: a better one would be to just add the missing Room item to the list).
Each item in the UI's games list shows the name assigned to the Room by its creator and the current number of players and spectators (versus the maximum number allowed to join the game for both roles).
By clicking the Play or Watch buttons, a user can join the game as a player or a spectator respectively. The only difference in the code is that a specific flag must be passed to the JoinRoomRequest instance to become a spectator.
	function onPlayGameBtClick(event)
	{
		if ($("#roomList").jqxListBox("selectedIndex") > -1)
		{
			// Join selected room
			var room = $("#roomList").jqxListBox("getSelectedItem").originalItem.roomObj;
			sfs.send(new SFS2X.JoinRoomRequest(room));
		}
	}

	function onWatchGameBtClick(event)
	{
		if ($("#roomList").jqxListBox("selectedIndex") > -1)
		{
			// Join selected room
			var room = $("#roomList").jqxListBox("getSelectedItem").originalItem.roomObj;
			sfs.send(new SFS2X.JoinRoomRequest(room, "", sfs.lastJoinedRoom.id, true));
		}
	}
Also for the client who joined the Room, now everything proceeds as discussed in the previous paragraph, from the ROOM_JOIN event up to the "ready" command sent to the server.
Before continuing with the actual gameplay, let's mention two more features. In each moment a user can leave the game by clicking the Leave game button. The client goes back to the lobby Room; the Room Extension instead detects that the user has gone and, if he is a player, sends the "stop" command to the users (a player and possibly some spectators). The onExtensionResponse() listener handles the server message showing a popup.
In particular, if the user receiving the "stop" command is a spectator, the popup contains a button to join the game now. This takes advantage of the spectator-to-player switch feature of SmartFoxServer; when the button is clicked, the client sends a SpectatorToPlayerRequest: upon a successful switch (an error could occur if, meanwhile, another user occupied the available player slot), the Room Extension starts the game.
» Play the game
The game starts when two players send the "ready" command to the Extension, when one of the players leaves the game and a spectator takes his place, or when the Restart button is clicked by one of the two players when the previous match finishes.
The game start is signaled by the Extension through the "start" response, delivered by means of the EXTENSION_RESPONSE event. The onExtensionResponse() handler calls the startGame() method, which reads the custom parameters sent by the Extension (players identifiers and names, and the id of the first player), resets the game board (just in case a previous game was restarted), removes the "wait for opponent" popup, sets the status message (showing the next user to play his turn) and enables the makeMove() click listener on the board for the next player.
	function startGame(params)
	{
		whoseTurn = params.get("t");
		player1Id = params.get("p1i");
		player2Id = params.get("p2i");
		player1Name = params.get("p1n");
		player2Name = params.get("p2n");

		// Reset the game board
		resetGameBoard();

		// Remove the "waiting for other player..." popup
		removeGamePopUp();

		p1NameCont.name.text = player1Name;
		p2NameCont.name.text = player2Name;

		setTurn();
		enableBoard(true);

		gameStarted = true;
	}
Players now alternate in clicking the board cells to place their pieces. Every time a valid board space is clicked, the makeMove() method shows the player's piece and sends the "move" request to the server. This contains a custom SFSObject with the coordinates of the board cell clicked by the user.
	function makeMove(evt)
	{
		var square = evt.target;
		square.ball.gotoAndStop(sfs.mySelf.getPlayerId(sfs.lastJoinedRoom));
		square.onClick = null;

		enableBoard(false);

		var x = square.id % 3 + 1;
		var y = Math.floor(square.id / 3) + 1;

		var obj = new SFS2X.SFSObject();
		obj.putInt("x", x);
		obj.putInt("y", y);

		sfs.send( new SFS2X.ExtensionRequest("move", obj, sfs.lastJoinedRoom) )
	}
The server validates the move and sends it back to all users in the Room using an EXTENSION_RESPONSE event as always, this time with the "move" command identifier. Then it checks if the victory or tie condition is reached, which would make the game over.
On the client, when a player move is received, the moveReceived() method updates the board and sets the next player.
If the end game condition is reached, the server sends the "win" or "tie" response to the clients, also sending the id of the winner (if any) in the custom SFSObject attached to the usual EXTENSION_RESPONSE event. The clients can then stop the game and show a popup message containing a button to restart the game (see the showWinner() method).
» Server responses recap
As a final recap, these are all the commands (or game state updates, if you like) sent by the server as EXTENSION_RESPONSE events and processed by the clients in the onExtensionResponse() listener:
- start: both players are ready to play and the game should begin; it provides the player identifiers and indicates the first player
- stop: a client left the game prematurely, so this should be halted immediately
- move: a player made his move; it provides the board coordinates of the piece placed by the player and the next player id
- specStatus: a spectator joined a game already in progress; it provides the game board and turn state to update that user only
- win: a player made a winning move and the game should end; it provides the winner id
- tie: no more moves are possible and no player won the game
	function onExtensionResponse(evt)
	{
		var params = evt.params; // SFSObject
		var cmd = evt.cmd;

		console.log("> Received Extension Response: " + cmd);

		switch(cmd)
		{
			case "start":
				startGame(params);
				break;
			case "stop":
				userLeft();
				break;
			case "move":
				moveReceived(params);
				break;
			case "specStatus":
				setSpectatorBoard(params);
				break;
			case "win":
			case "tie":
				showWinner(cmd, params);
				break;
		}
	}
» Server code highlights
In this section we will briefly discuss the structure of the server side Extension attached to the game Room to provide the actual game logic: it determines if the game should start or stop, validates the player moves, updates the spectators if they join a game already in progress, checks if the win or tie condition is met, etc.
Specifically we will get the code snippets from the JavaScript version of the Extension, which is enabled by default. The same logic (in a different language) is coded in the Java Extension; you can refer to the Tris tutorial for Unity to check the Java code snippets.
The Extension folder contains two files: TrisExtension.js constitutes the main Extension class, while TrisGameClasses.js contains a couple of utility classes and it's imported at the very beginning of the Extension's main file.
» Extension's initialization
As this is a Room Extension, it is loaded by the server as soon as the Room is created. The default init() method is then always called: this is where we setup all the listeners required by our game.
	function init()
	{
		trace("TrisJS Extension init (version " + VER + ")");

		moveCount = 0;
		gameBoard = new TrisGameBoard();

		// Register client request handlers
		addRequestHandler("ready", onReadyHandler);
		addRequestHandler("move", onMoveHandler);
		addRequestHandler("restart", onRestartHandler);

		// Register server event handlers
		addEventHandler(SFSEventType.USER_DISCONNECT, onUserDisconnect);
		addEventHandler(SFSEventType.USER_LEAVE_ROOM, onUserDisconnect);
		addEventHandler(SFSEventType.SPECTATOR_TO_PLAYER, onSpectatorToPlayer);
	}
The first batch of handlers takes care of the requests sent by the users in the Room by means of the ExtensionRequest class, respectively with the "ready", "move" and "restart" command identifiers we discussed (or mentioned) in the previous section.
The last three handlers listen for server events that might occur during the game and that we need to manage appropriately.
» Request handlers
The onReadyHandler() request handler checks if the user who sent the "ready" command is a player: if yes, and if two players are now in the game Room, it sends the "start" signal to all the users in the Room (so including spectators); if no, it updates the spectator sending him the current board and turn state in the "specStatus" response.
To check if two players are now in the Room, we use the getSize() method of the current Room object (which, from the Extension point of view, is its parent Room): the method returns a RoomSize Java object with three more methods to get the total number of users in the Room, the number of spectators only or the number of players only. We use the latter:
	if (getParentRoom().getSize().getUserCount() == 2)
		startGame();
Sending a response to clients is straightforward; for example:
send("start", resObj, getParentRoom().getUserList());
The first parameter is the response identifier, the second one is a SFSObject containing custom parameters and the third one is the list of the response recipients.
The onMoveHandler() request handler receives the board coordinates of the piece placed by a player. The player move is first validated (this is always a good practice!) to avoid cheating: the request must contain the expected parameters, the game must be already started, the sender of the request must be the active player (the player expected to make a move) and the target cell of the board must still be empty.
If all the conditions are met, the game board is updated, the move is sent to all users in the Room through the "move" response (so they can update the UI), the active player is switched and the victory or tie condition is checked. In case the game just ended, either the "win" or "tie" response is sent to all the users.
The onRestartHandler() request handler receives a request from one of the players to restart a match after it ended. It just checks if two players are currently in the Room and in case it sends the "start" signal again (see above).
» Event handlers
The onUserDisconnect() event handler is called either when an actual disconnection from the server occurs or a user just leaves the game (clicking the Leave game button in the UI).
In both cases the purpose of the method is to get the identifier of the user who left the game and, if he was a player, end the game and send the "stop" notification to all the other users (player and possible spectators).
The onSpectatorToPlayer() event handler makes the Extension realize that a spectator requested to be turned into a player. We just have to check if two players are again available in the Room and send the "start" signal to everybody.
To see an other advanced uses of SmartFoxServer, including a complete realtime game, you can now move onwards to the next examples.
NOTE
You should also read the comments to methods and properties in the example source code for additional informations.
» More resources
You can learn more about the SmartFoxServer basics by consulting the following resources: