

SFS2X Docs / DevelopmentBasics / login-phase
» The login phase
We have seen in the previous chapter how to start a connection to SmartFoxServer and have mentioned that logging in a Zone is necessary before the client can start to interact with the server API and the other users.
In order to see the Zones available in the server and create new ones you can use the SFS2X Admin Tool. In the left side bar of the tool choose Zone Configurator and a list of all Zones will be presented.
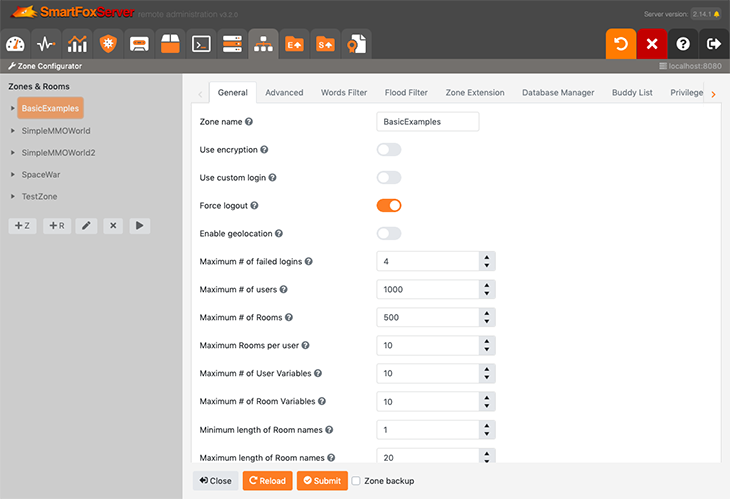
From here you can double click (or select and click the edit button) any Zone name and proceed with the configuration of the Zone settings. Please refer to the Zone Configurator documentation for usage instructions.
» Default vs custom login
Before we proceed to show the basic code for the login request we need to point our attention to one very important setting in the Zone called Use custom login.
The value of this parameter (which is by default set to off) determines which controller will receive and handle the login request.
- Custom login switched off: the System Controller will handle the login phase. In this case any user name will be accepted unless another user is already logged in the Zone with an identical name. The password will be ignored. If an empty string is passed as the name, the Server will automatically generate a "guest" username (e.g. Guest#42).
- Custom login switched on: the Extension Controller will handle the login phase allowing the developer's Extension to validate the user credentials and perform any other required operation.
» Logging in a Zone
The login phase is always initiated from the client side by sending a LoginRequest to the Server. This requires several parameters:
- user name: (optional) a user name
- password: (optional) a password
- Zone name: the name of a Zone; it must exist on the server-side
- extra parameters: (optional) an object containing extra custom data; typically this is used in conjunction with an Extension-based login in order to send custom data to the server-side
Logging in a Zone requires just a few lines of code: in essence you just need to register the SmartFox class instance (sfs) to receive the SFSEvent.LOGIN and SFSEvent.LOGIN_ERROR events and proceed with the request.
	...

	// Add login-related event listeners during the SmartFox instance setup
	sfs.AddEventListener(SFSEvent.LOGIN, OnLogin);
	sfs.AddEventListener(SFSEvent.LOGIN_ERROR, OnLoginError);

	...
	...

	// After the successful connection, send the login request
	sfs.Send(new Sfs2X.Requests.LoginRequest("", "", "BasicExamples"));
	private void OnLogin(BaseEvent evt)
	{
		User user = (Sfs2X.Entities.User)evt.Params["user"];
		Console.WriteLine("Login successful; username is " + user.name);
	}

	private void OnLoginError(BaseEvent evt)
	{
		Console.WriteLine("Login failed: " + (string)evt.Params["errorMessage"]);
	}
	...

	// Add login-related event listeners during the SmartFox instance setup
	sfs.addEventListener(SFS2X.SFSEvent.LOGIN, onLogin, this);
	sfs.addEventListener(SFS2X.SFSEvent.LOGIN_ERROR, onLoginError, this);

	...
	...

	// After the successful connection, send the login request
	sfs.send(new SFS2X.LoginRequest("", "", null, "BasicExamples"));
	function onLogin(evt)
	{
		console.log("Login successful; username is " + evt.user.name);
	}

	function onLoginError(evt)
	{
		console.warn("Login failed: " + evt.errorMessage);
	}
	...

	// Add login-related event listeners during the SmartFox instance setup
	sfs.addEventListener(SFSEvent.LOGIN, onLogin);
	sfs.addEventListener(SFSEvent.LOGIN_ERROR, onLoginError);

	...
	...

	// After the successful connection, send the login request
	sfs.send(new LoginRequest("", "", "BasicExamples"));
	private function onLogin(evt:SFSEvent):void
	{
		trace("Login successful; username is " + evt.params.user.name);
	}

	private function onLoginError(evt:SFSEvent):void
	{
		trace("Login failed: " + evt.params.errorMessage);
	}
In the above snippets we use a default login (handled by the System Controller) and pass empty strings as user name and password, thus obtaining an auto-generated guest name.
NOTE
Actually it is not needed to pass the Zone name to the LoginRequest constructor; this can be set in the ConfigData object when setting-up the SmartFox class instance.
Here's another LoginRequest snippet:
sfs.Send(new Sfs2X.Requests.LoginRequest("Fozzie"));
sfs.send(new SFS2X.LoginRequest("Fozzie");
sfs.send(new LoginRequest("Fozzie"));
In this case we send our user name, no password, and by not specifying the Zone name the system will use the one set in the configuration object.
» What could go wrong?
During the login phase the Server performs a number of validations that could block the process and cause the SFSEvent.LOGIN_ERROR event to be fired. Let's see in brief which problems could arise.
- Missing Zone: the requested Zone name doesn't correspond to any available Zones on the server.
- Zone full: the requested Zone has reached the maximum amount of users allowed (configurable in the AdminTool's Zone Configurator module).
- Server full: the SmartFoxServer instance has reached its maximum capacity and cannot accept another user.
- Duplicate names: no two users can take the same name in a Zone. This is case-sensitive, so two users with names "Fozzie" and "fozzie" will not create any problems.
- Bad words in user name: if a Word Filter is configured in the Zone and it is applied to user names, an error could be fired if such name matches any of the swear words configured in the filter.
- Banned user name: if the provided user name was banned by a moderator or administrator the client will not be able to join the Zone until the banishment is expired.
» The Room List
In the first code example we have seen that when the login is successful the server joins the user in the requested Zone. Behind the scenes SmartFoxServer also performs a few other operations that we need to know about.
- Auto-subscribe the default Room Groups: in the Zone Configurator you can declare a number of public Room Groups. By default there is only one Group called "default" and you can add more, if necessary. A Room Group is nothing more than a string id that it is used to organize Rooms in different categories called Room Groups.
Upon login the client will be subscribed to all the Groups specified in the Default Room Groups setting of the Zone. - Populate the client with the initial Room List: behind the scenes the client receives a Room List which is populated with all the Rooms contained in all subscribed Groups. This operation is done once, at login time, then only small updates will be sent to the client to maintain the Room List up to date with the Server.

In the example above the Zone contains three different Room Groups called Europe, America and Asia, each containing a certain amount of Rooms. If we suppose that the Zone's default Group property is set to "Europe,America" the client Room List will be populated with the details of all Rooms in those two groups and will receive updates about any "interesting" changes (e.g. a new Room is created or another one is removed, etc).
You can read additional informations about Groups in this document.
» Custom login
One very common use case in the login process is to write an Extension that handles the user credentials and checks them against your database. In order to do so you will need a few preliminary steps.
- Setup a database connection. You can follow this tutorial on how to configure SFS2X to communicate with your DB.
- Prepare a simple Extension that will execute the validation of the user name and password. We provide an in-depth overview of the Extensions and a login how-to tutorial.
- Turn on the Use custom login setting in the Zone Configurator and setup your Extension.