

SFS2X Docs / ExamplesIOS / connector
» Connector
» Overview
The Connector example is the most basic SFS2X application you can create: it simply shows how to load the external client configuration and connect to SmartFoxServer 2X.
The SmartFoxServer 2X client API allows the connection details to be stored in an external xml configuration file which can be loaded right after the main API class (SmartFox) is instantiated. In the case of Flash, the XML config file is an intelligent source for our client configuration information. It avoids client recompilation in case, for example, the IP address of the server is changed (this is a common scenario when moving an application from the development/testing environment to the production environment) or when you need to turn on/off debug messages easily. However, for most iOS applications, this is rather redundant. We can easily avaoid using the XML file completely, by accessing the configuration class directly.
The main connection parameters contained in the xml file and used by this example are the server's IP address to connect to and the TCP port used for communication. For a detailed list of available parameters, please refer to the iOS API documentation.
After the external configuration is loaded, the connection can be established automatically by the API, or manually by calling the proper method (see the Code highlights paragraph below). An event is then fired to notify if the connection has been established or not.
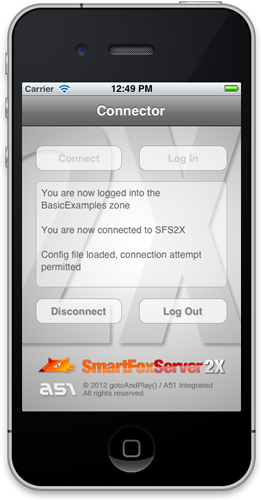
This simple example features four buttons — "Connect", "Log In", "Disconnect", and "Log Out" — and performs the same functions as their titles indicate.
>> DOWNLOAD the source files <<
» Installation
» Source code setup
The example assets are fully contained in a project file and don't require a specific setup: simply open the Connector.xcodeproj file contained in the ![]() folder with Xcode.
folder with Xcode.
» Running the example
In order to run the application follow these steps:
- make sure your SmartFoxServer 2X installation contains the BasicExamples Zone definition;
- start SmartFoxServer 2X;
- make sure the client will connect to the right IP address by editing the <ip> entry in the xml file available under the Supporting Files folder in Xcode;
- select the iPhone Simulator from the Scheme dropdown and click the Run button to launch the simulator.
» Code highlights
The application has a single View and an AppDelegate. In this example, all logic is contained within the View.
The Connect button is referenced in the ViewController.h header file as connectBtn and it's Touch Up Inside event is wired up to the connect method. Similarly, the Log In button is referenced as loginBtn and wired up to the login method. The other two buttons follow the same pattern.
To start interacting with SmartFoxServer, we must first allocate and instantiate the SmartFoxServer client. This is handled in the default viewDidLoad method:
	- (void)viewDidLoad
	{
	    [super viewDidLoad];
		smartFox = [[SmartFox2XClient alloc] initSmartFoxWithDebugMode:YES delegate:self];
	    smartFox.logger.loggingLevel = LogLevel_DEBUG;

		[smartFox loadConfig:@"config.xml" connectOnSuccess:NO];
	}
Here, we instantiate our client with debug mode set to YES, which will give us detailed information in the debug output window of Xcode. You'll notice that events are being handled at various points in the process of logging into SFS. The first event we listen for is the onConfigLoadSuccess event. Once received, we can enable our Connect button and proceed. As well, the connectOnSuccess argument is being passed as NO since we will handle connection independently.
Without a connection, all buttons are disabled except the Connect button.
Cicking on the Connect button is handled by the connect method:
	- (IBAction)connect:(id)sender
	{
	    [smartFox connect];
	    connectBtn.enabled = NO;
	}
which simply calls the connect method in the SmartFoxServer client API. Again, events will indicate whether we have succesfully connected to the server.
Once connected, our Log In button becomes enabled, and we can perform a similar process to log into a Zone.
	- (IBAction)login:(id)sender
	{
	    [smartFox send:[LoginRequest requestWithUserName:@"" password:@"" zoneName:nil params:nil]];
	    loginBtn.enabled = NO;
	}
Here, we pass all empty arguments of the LoginRequest so the settings from our config.xml will be used and a guest user name will be automatically given to the user. The response from the server to our LoginRequest is handled with two events, one for success and one for failure:
	- (void)onLogin:(SFSEvent *)evt
	{
	    [self trace:@"You are now logged into the BasicExamples zone"];
	    loginBtn.enabled = NO;
	    logoutBtn.enabled = YES;
	}

	- (void)onLoginError:(SFSEvent *)evt
	{
		[self trace:@"Error logging into the BasicExamples zone, please check logs"];
	    loginBtn.enabled = YES;
	}
If the login request was successful, the client will now be visible in the Zone when viewing through the Admin Tool.
The Log Out and Disconnect buttons act in much the same manner, calling specific methods of the SmartFoxServer client API. You can review the source code for the details.
You can now proceed to more advanced examples showing real applications and games.
» More resources
You can learn more about the SmartFoxServer basics by consulting the following resources:
- Development basics (introduction to the Zone concept and basic client-server communication steps)
- The connection phase
- The login phase