

SFS2X Docs / ExtensionsJava / writing-extensions
» Writing the first Java Extension
Extensions are an important component in SmartFoxServer 2X, offering developers a vast array of possibilities to create custom game logic and integrate other technologies to support their project.
In this article we're going to walk you through all the necessary steps to create and deploy a basic SFS2X Extension.
» Use an IDE to assist the development
For starters we need a Java IDE that assists us in writing code, compiling it and creating a binary package (jar file) that will be deployed to SFS2X.
There are several great Java IDEs available, both free and commercial. We usually recommend:
In this tutorial we will be using Eclipse, however setting up a new project in another IDE should be a similar process. If you're more familiar with another Java IDE you should be able to follow along and translate the steps provided here. (If not, we recommend that you try Eclipse).
» Setting up a new project
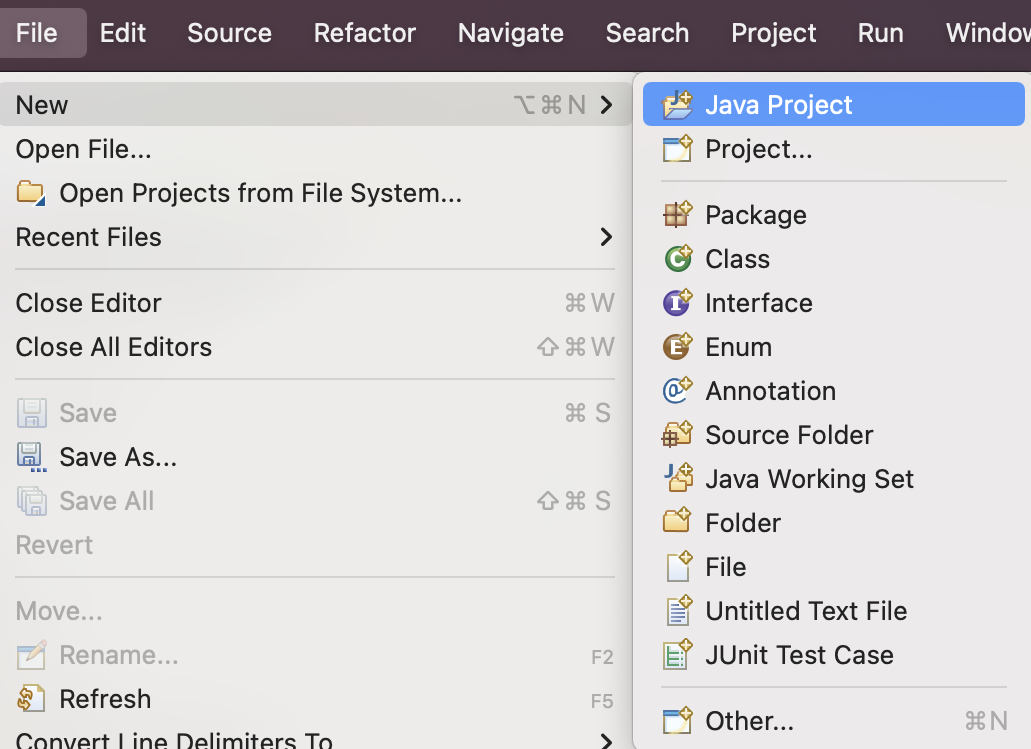
Let's start Eclipse and from the File menu choose New > Java Project.
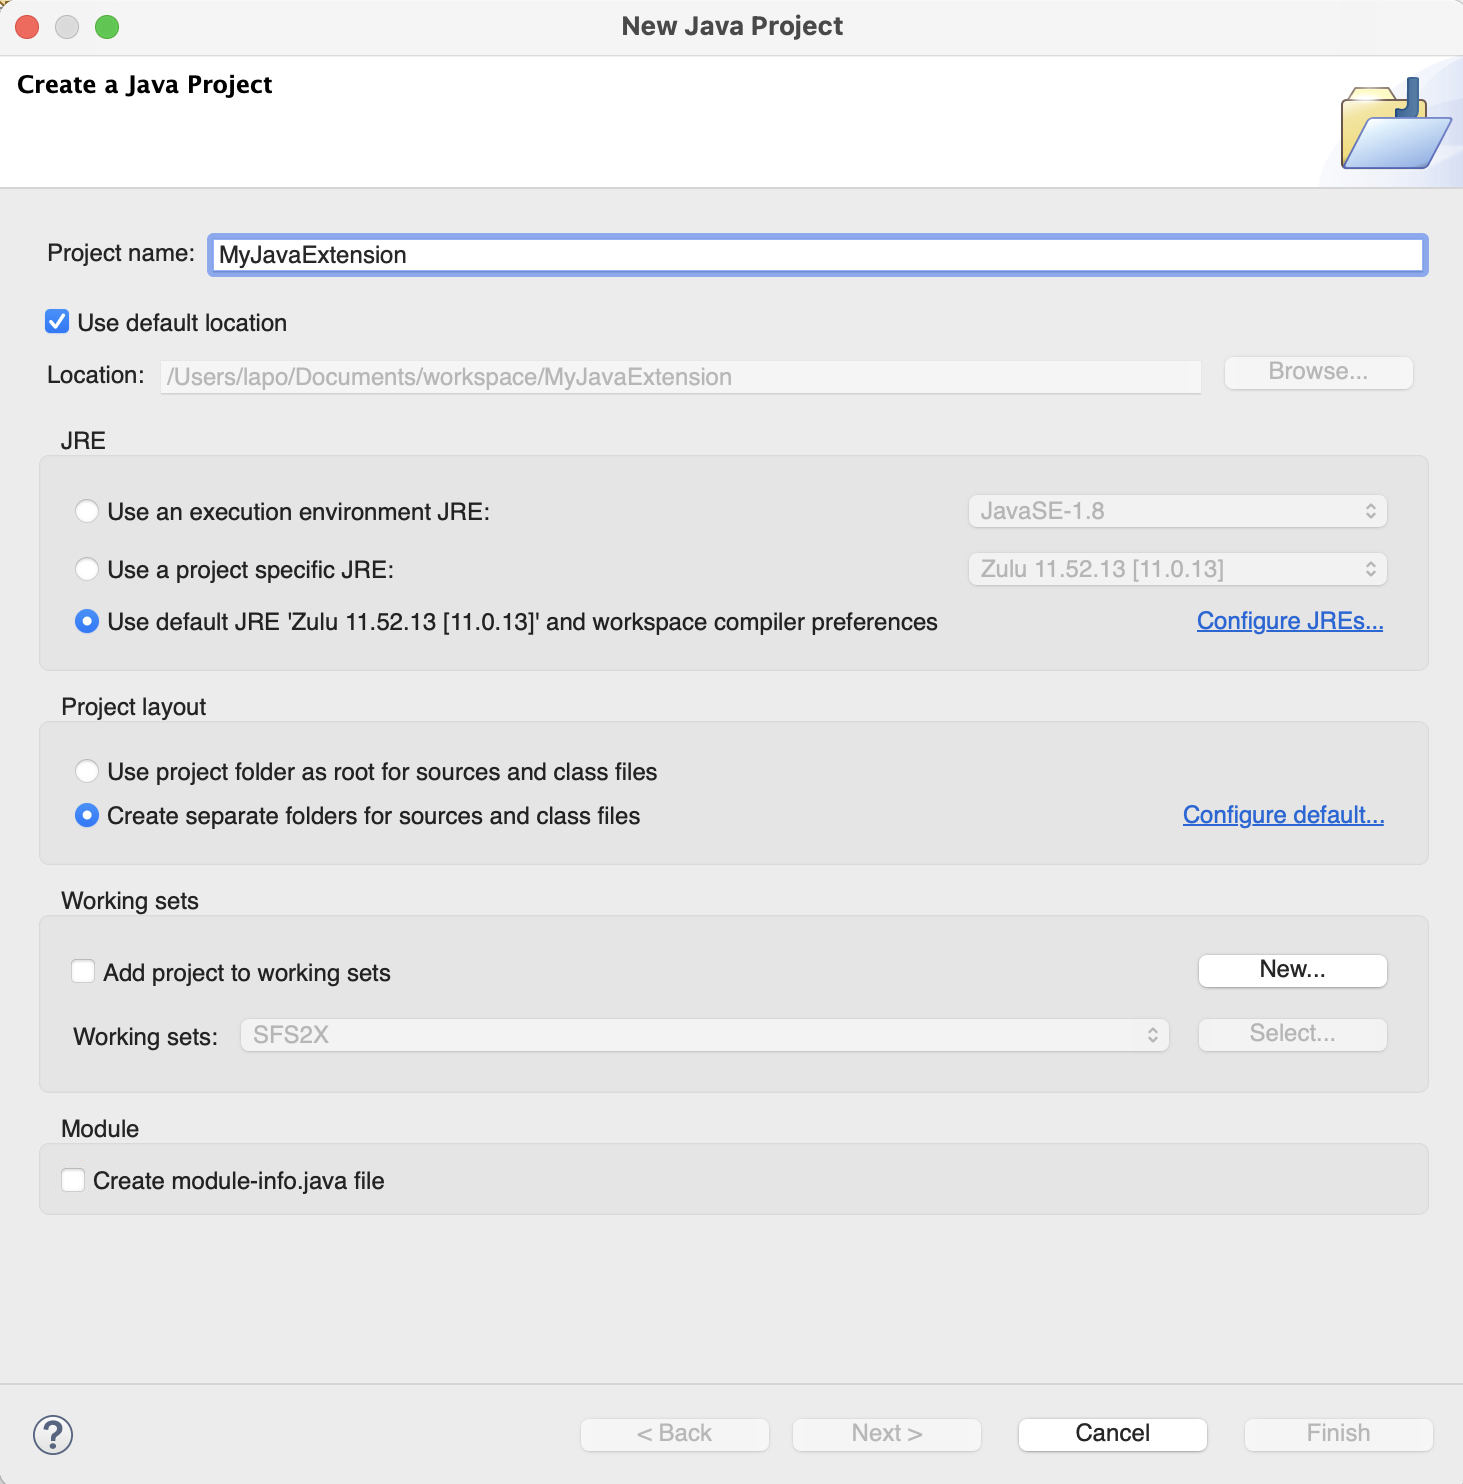
In the new window we give the project a name, for example MyJavaExtension, and choose a Java Runtime such as JRE 8 or JRE 11.
If the default JRE is higher than Java 11, you can select Use an execution environment JRE and choose Java 11 instead, to ensure compilation compatibility.
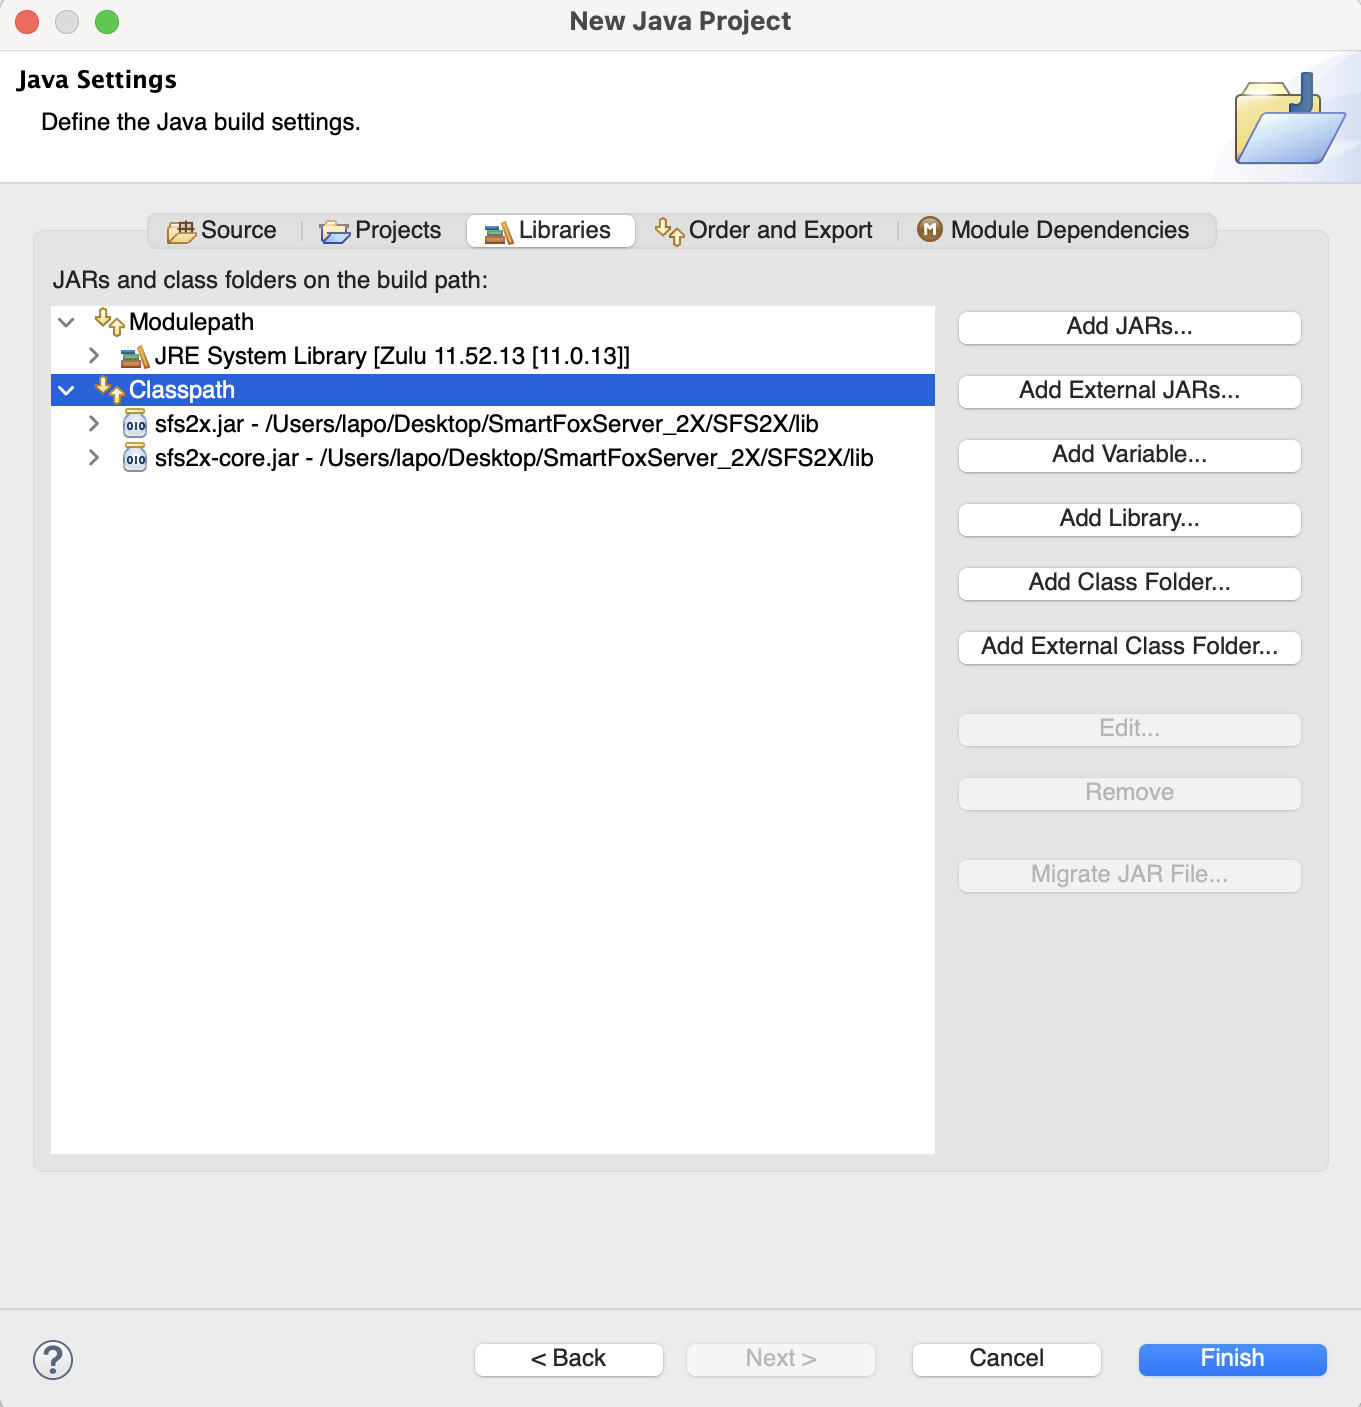
Now it is time to add the libraries that are needed to compile our Extension. Click on Libraries tab, select Classpath, then on the Add External JARs... button and navigate your file system to your {sfs-install-dir}/SFS2X/lib/
folder.
Select two files: sfs2x-core.jar and sfs2x.jar and click Finish in the main window.
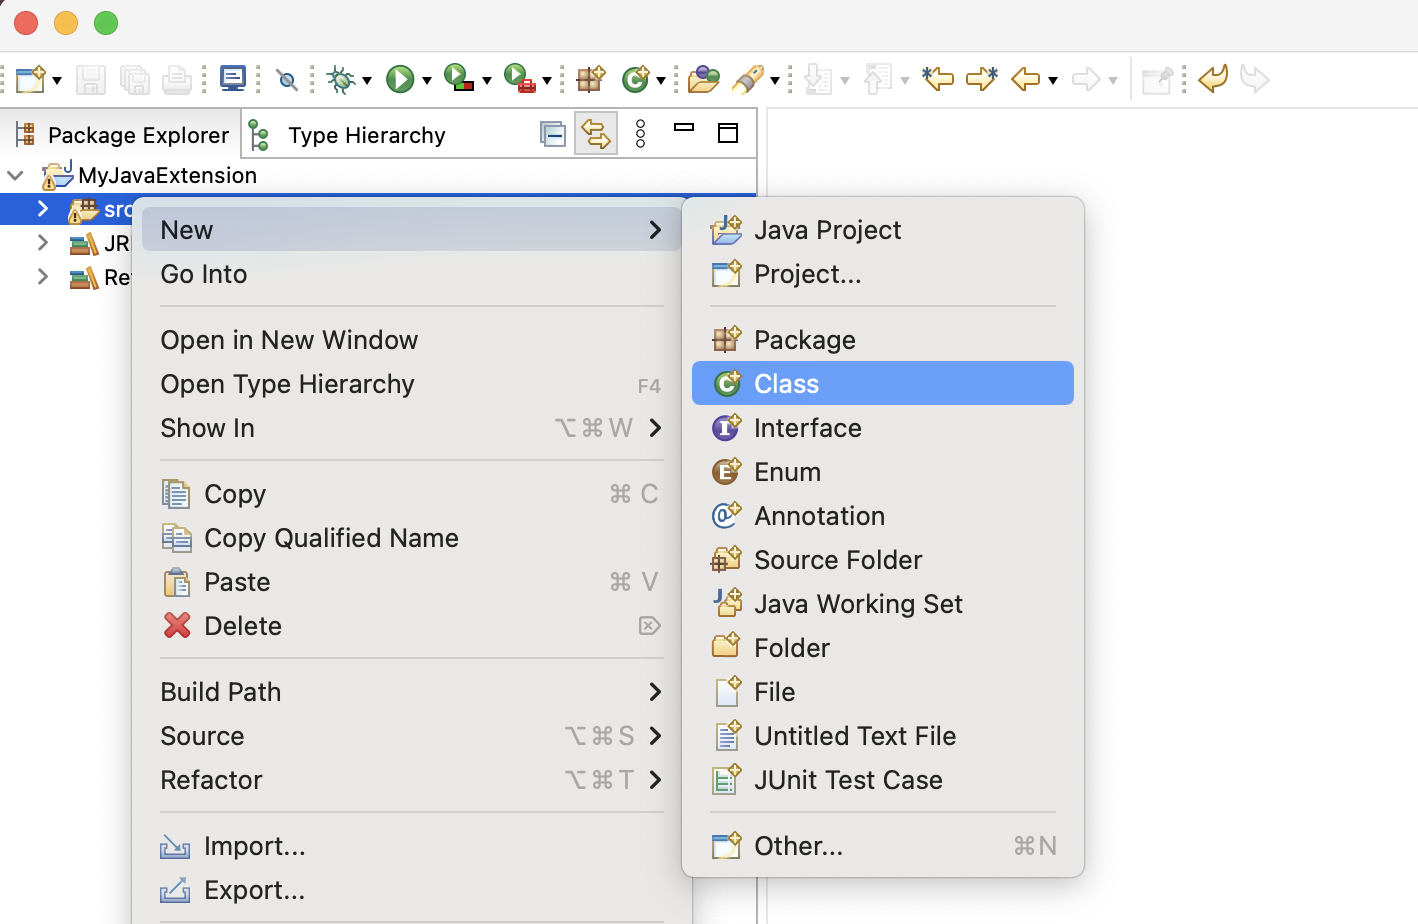
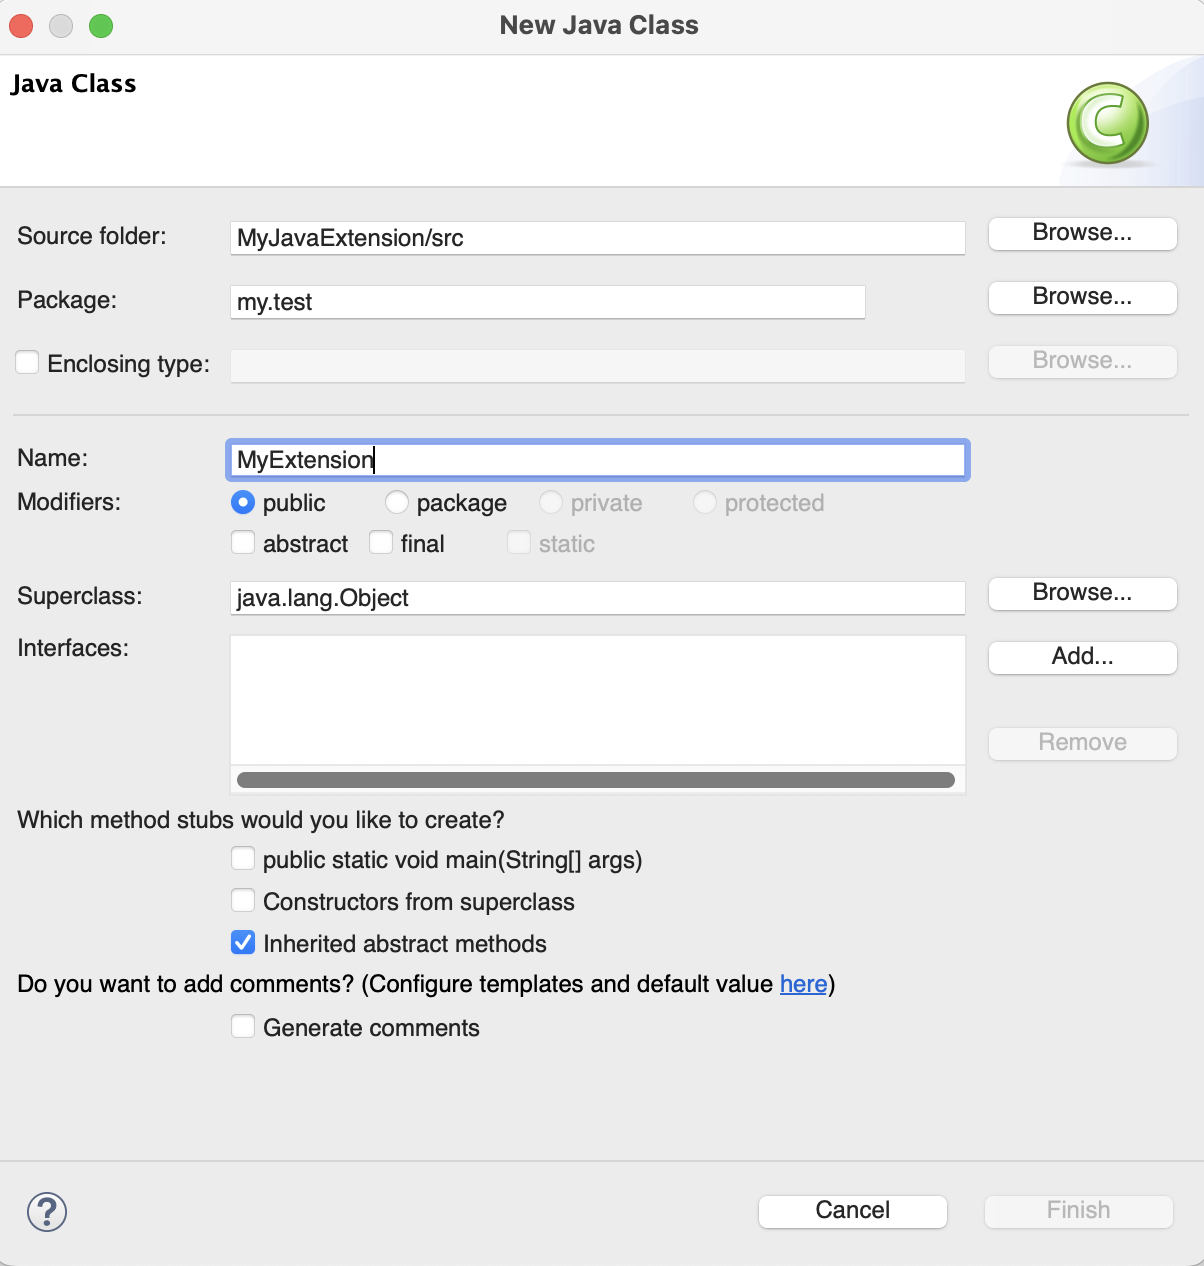
The new project will appear in the Package Explorer panel which by default is located at the top left column of your interface. Now you can create a new Java class by right-clicking on the src folder and selecting New > Class from the menu.
Here we proceed by entering the name of the class, for example MyExtension, and its package which in this case will be my.test. Please notice that using the Extension suffix in the class name is highly recommended, because it makes it easier to assign it to the server's Zone or Room in the AdminTool (see the additional note on the Type parameter of the Zone Extension tab or Room Extension tab in the Zone Configurator module documentation).
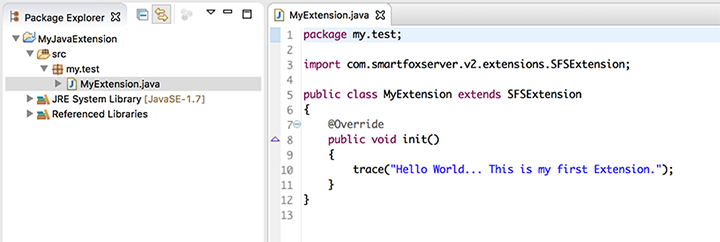
Finally we have created our main Extension class; we can now proceed adding some very basic code like the following picture shows.
In this article we are not going to dive into the details of coding server side logic. After you've finished this tutorial you can watch a short Youtube video on how to write a simple Extension and you can consult more advanced articles on the same topic:
- Extensions overview article
- Extension API tutorial
- Advanced Extension concepts document
- Java server-side API documentation, in particular the SFSApi class which represents the entry point to interact with the server
- the Tris and SpaceWar games, available for all supported platforms, which include server-side source code
- the BattleFarm and Space Race ActionScript 3 games, which include both client and server-side source code
» Deploying the Extension
The deployment follows a simple set of rules. Every extension must reside in a folder under the SFS2X/extensions/ folder. The name you choose for this folder will determine the Extension name that is shown in the AdminTool when you activate the Extension.
Let's say we create a folder called MyFirstExtension under extensions/. Under this path we can deploy the jar file containing our server code classes and any other jar file that might contain other dependencies required in our Extension.
IMPORTANT NOTE
The name of the main Extension jar file must end with the word Extension, for example MyExtension.jar. This is important because the AdminTool will only show the classes contained in the jar files which use this convention. For more informations see the additional note on theUse naming convention setting of the Zone Extension tab or Room Extension tab in the Zone Configurator module documentation).
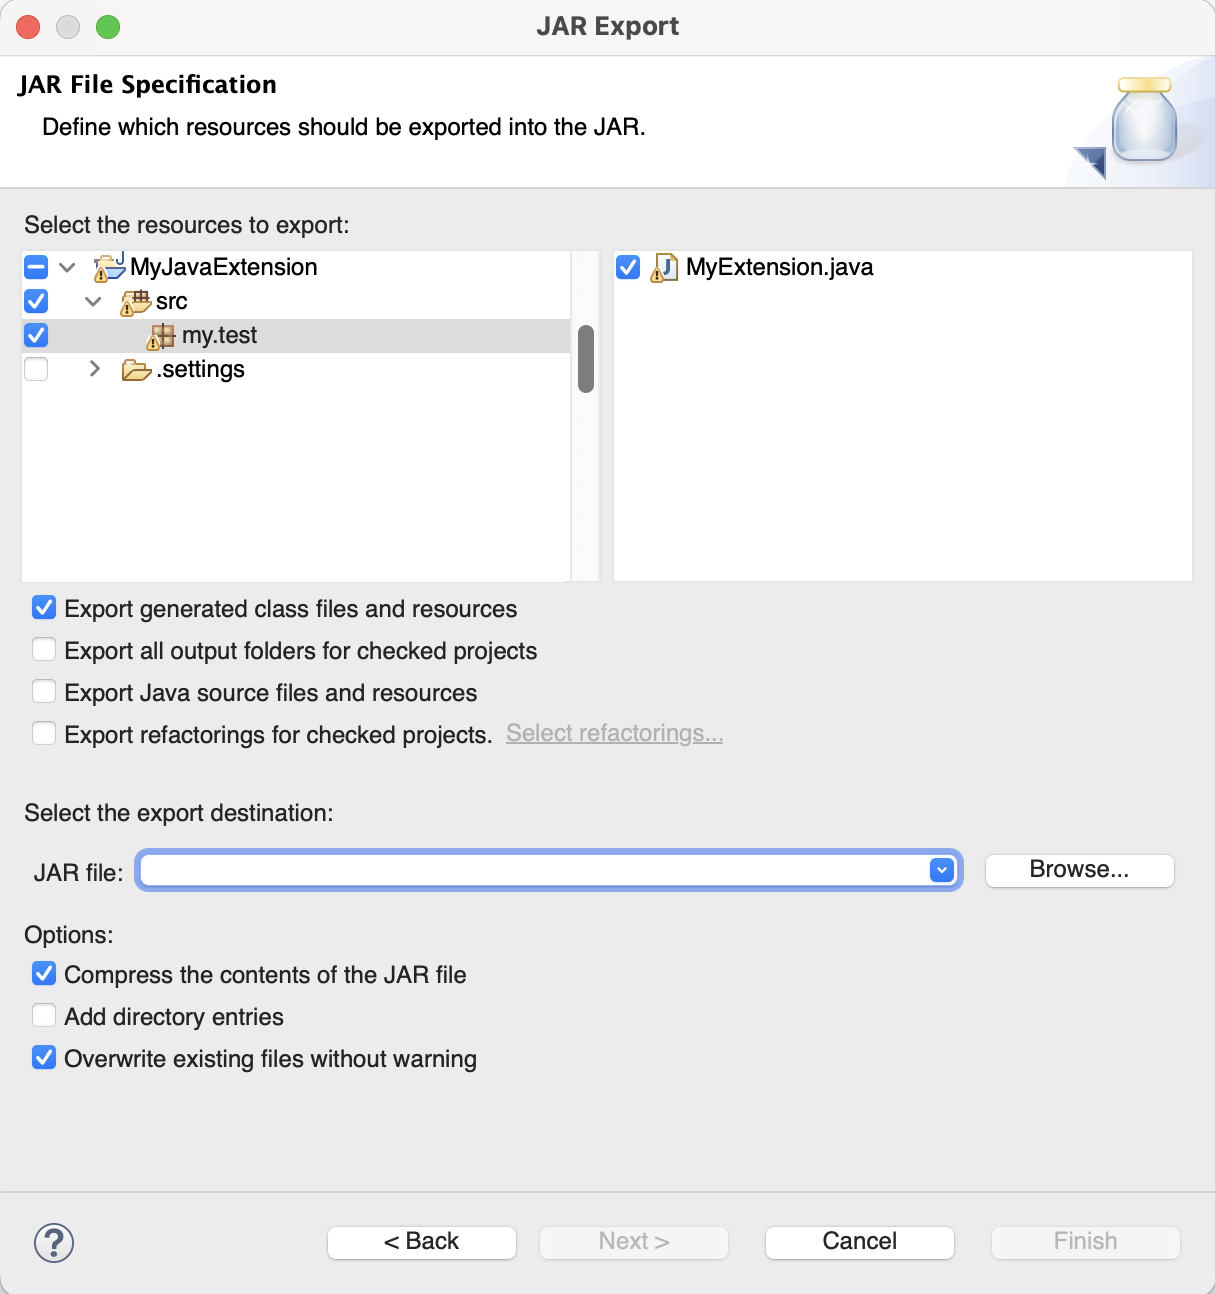
In Eclipse the compiled classes are usually stored in the bin/ folder, which sits next to the src/ folder in your project. You can export the compiled code in a jar file directly to the SFS2X deployment folder by following the next steps.
In the Package Explorer right-click the project folder and choose Export.... In the next dialogue box open the Java folder and choose JAR file, then click the Next button. A new window will open, click the Browse...button in the middle of it and navigate to the SFS2X deployment folder (as we explained) specifying a name for the jar file to be created (remember the naming convention described above).
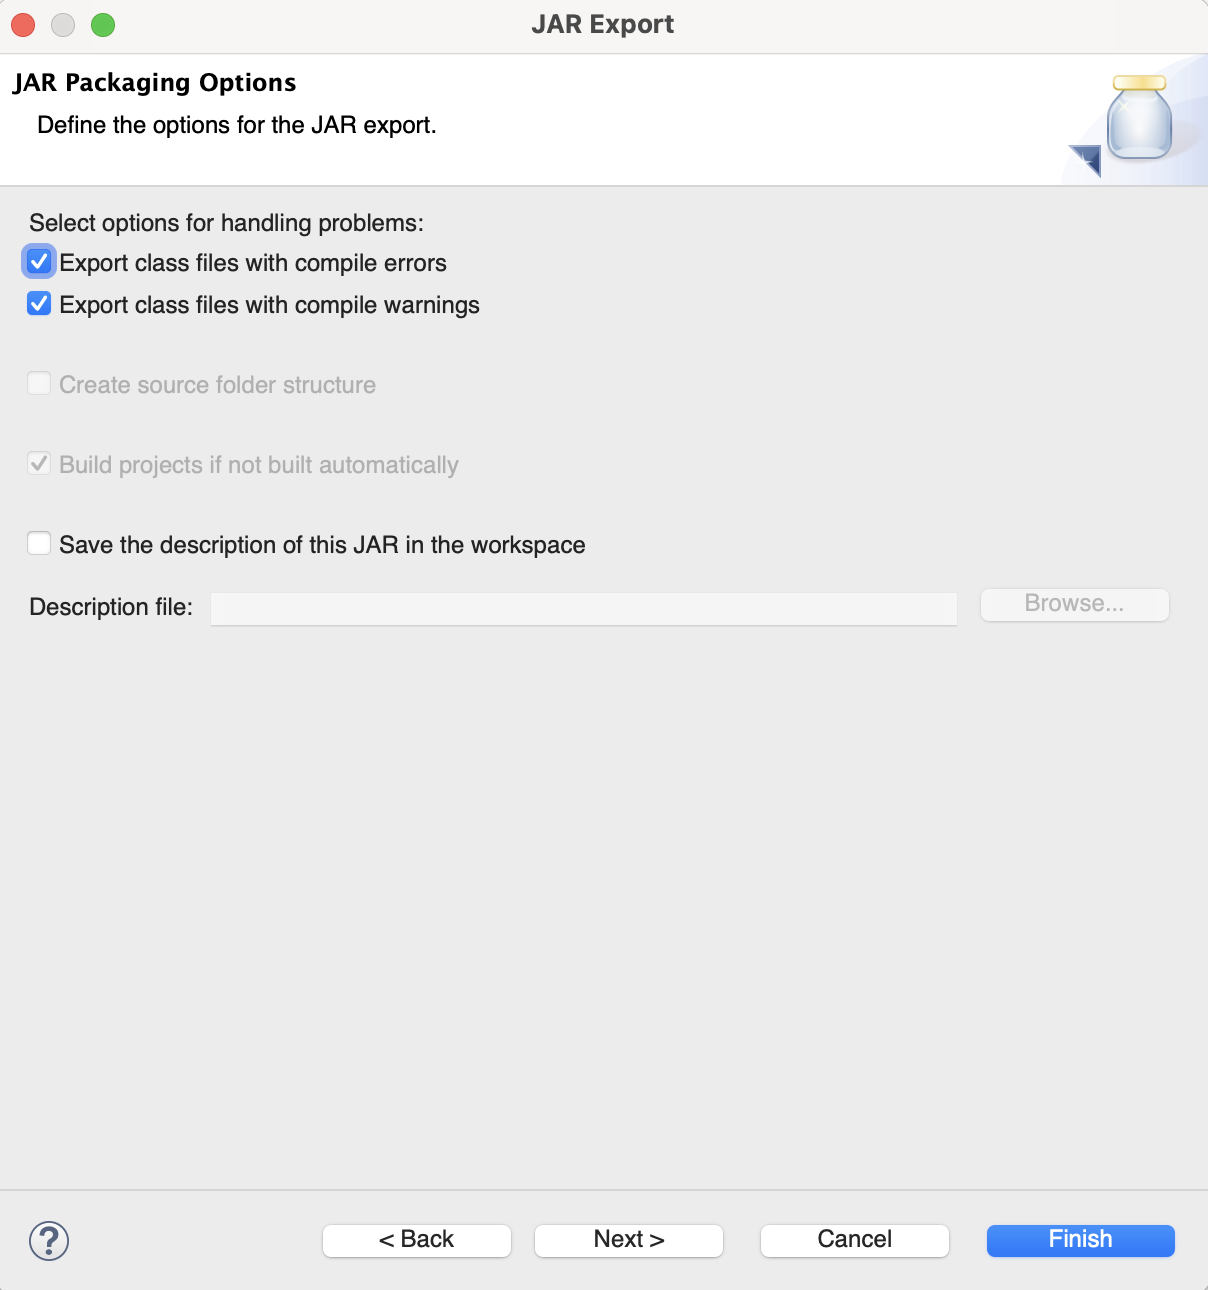
Click Next to advance to the next screen. Here you can store the export settings so that the next time you need to re-deploy your Extension it can be done in a snap, by simply clicking a file in your project folder.
Activate the check box next to the Save the description... and click Browse....You will be presented a list with all your Java projects, select your own and provide a name for the export configuration; click Ok to close the panel and click Finish to complete the process.
At this point you will have deployed your jar file in the SFS2X Extension folder and also saved the export configuration for future re-deployments.
SFS2X can actively monitor all the Extension folders for changes and as soon as it detects an updated jar file it will restart your Extension. This is valid for all Zone-level Extensions, while it cannot be done for Room-level Extensions.
In order to toggle this feature you need to launch the Server Configurator in the AdminTool and turn on the Extension file monitor option.
» Assigning an Extension to a Zone or Room
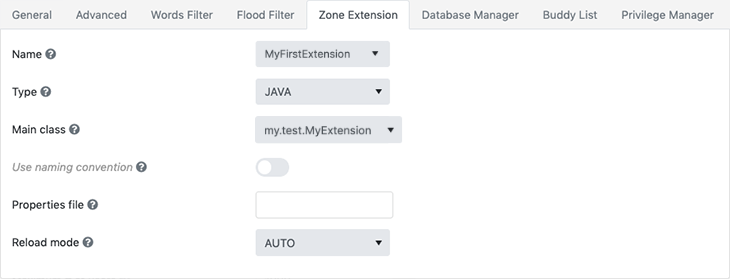
The most simple way to plug our Extension to a Zone or Room is via the AdminTool. Launch the Zone Configurator, select a Zone and enter the edit mode. You will find the Zone Extension tab where you can configure a few parameters. Essentially all you need is to select the Extension name and the main Extension class (the one extending SFSExtension).
Now you can save, restart the server and the Extension will be activated. The same can be done for Room Extensions: simply access the Room Extension tab in the Room configuration panel of the Zone Configurator panel.
» Python Extensions
We should also quickly mention that it is possible to write Python scripts and run them as Extensions, although this is not recommended for production. The reason is that interpreted Python code is not able to deliver the performance obtained with Java code and we suggest its usage only for prototyping, testing, or non performance critical projects.
The process for building a Python extension is almost identical to what we have already described, but with a few small differences.
- You don't need Eclipse or a similar IDE to write the code. You can deploy directly your Python scripts (.py) under the Extension folder, nothing else is required. The server will then load the code, compile it at runtime and execute it.
- You need to specify in the AdminTool PYTHON instead of JAVA as the Extension type and the name of the script as the Main class setting in the configuration.
» What's next
Now that you have gained the basic understanding of how to create an Extension, it is time to learn more about the features offered by the server-side framework. Make sure to continue the learning process by following the links we recommend in the first part of this document.