

SFS2X Docs / ExamplesUnity / mmo-basics
» MMO Basics

» Overview
The MMO Basics example offers an introduction to SmartFoxServer's MMO API and the MMORoom object, which extends the functionalities of the regular Room by introducing the concept of Area Of Interest to determine the spatial range of the events that will be received by users. This, in conjunction with the use of User Variables to track the coordinates, allows creating a virtual environment in which potentially thousands of players can move around without overloading clients with updates.
Of course, being a proof-of-concept, this example features a very small and simple virtual world, with a minimal Area of Interest. The purpose is to demonstrate the behavior of the MMORoom; this can then be applied to a much bigger and complex 3D (or 2D) environment.
This example also features a server-side Room Extension, which accomplishes two tasks: (1) shows how to optimize the user positioning logic inside the MMORoom and (2) simulates any number of active users via the creation of automated Non-Player Characters (NPC) moving around the map randomly, entering and leaving the Area of Interest of players continuously.
In this tutorial we assume that you already went through the previous ones, where we explained the subdivision of the application into multiple scenes, and how to create a GlobalManager class to share the connection to SmartFoxServer among those scenes. The only difference here is that, for sake of simplicity, we removed the Lobby scene, making the user immediately join the game after the login.
>> DOWNLOAD the source files <<
» Setup & run
In order to setup and run the example, follow these steps:
- unzip the examples package;
- launch the Unity Hub, click on the Open button and navigate to the MMOBasics folder;
- if prompted, select the Unity Editor version to use (v2021.3 or later is recommended);
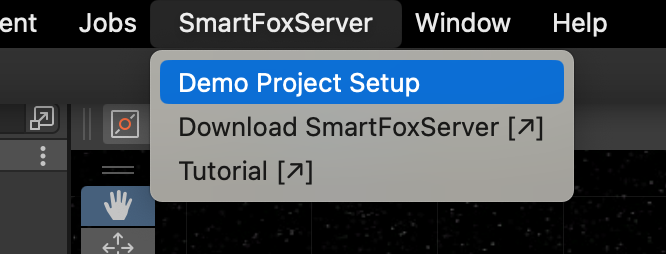
- click on the Window → SmartFoxServer → Demo Project Setup menu item in the Unity UI, and follow the additional instructions provided in the appeared Editor window.
From now, all mentioned project's paths must be intended as relative to the /Assets folder.
The client's C# code is in the Unity project's /Scripts folder, while the SmartFoxServer 2X client API DLLs are in the /Plugins/SmartFoxServer folder. Read the introduction to understand why multiple DLLs are used.
» Server-side Extension
This example features a server-side Java Extension. Its source code is contained in the /Other/SFS2X-MMOBasics-Source.zip file. Create and setup a new project in your Java IDE of choice as described in the Writing the first Java Extension document of the Java Extensions Development section. Then unzip the file and copy the content of the /Extension-Java/src folder to your Java project' source folder.
» Introduction to code
» Client code
The structure of the client code of this example is mostly the same we implemented for the Lobby template described in previous tutorials, with a <name>SceneController script attached to an empty Controller game object in the respective scene. As mentioned before, the Lobby scene has been removed and the creation an join of the Room where players are grouped is done in the LoginSceneController class directly.
» Server code
The Java Extension is made of a single class (MMOBasicsExtension) which includes an internal handler class (UserVariablesUpdateHandler) with a role in the user positioning logic and a Runnable class (NPCRunner) responsible of updating the position of NPCs in the virtual space.
» The MMORoom
In this example we wanted to have a single Room joined by all players. For this reason we decided to remove the Lobby scene seen in other examples and move the Room creation and joining in the LoginSceneController class.
In fact, as soon as the connection & login process is completed successfully, we check if a Room with a predefined name already exists; if not, the Room is created. In other words the first user entering the Zone since the server startup will cause the Room to be created, while all other users will always join the existing one.
	private void OnLogin(BaseEvent evt)
	{
		// Join the MMORoom if already existing...
		if (sfs.RoomManager.ContainsRoom(ROOM_NAME))
		{
			sfs.Send(new JoinRoomRequest(ROOM_NAME));
		}

		// ...or create one and join it
		else
		{
			MMORoomSettings settings = new MMORoomSettings(ROOM_NAME);
			settings.MaxUsers = 100;
			settings.DefaultAOI = new Vec3D(25f, 10f, 25f);
			settings.MapLimits = new MapLimits(new Vec3D(-100f, -10f, -100f), new Vec3D(100f, 10f, 100f));
			settings.Extension = new RoomExtension("MMOBasics", "sfs2x.extensions.games.mmobasics.MMOBasicsExtension");

			sfs.Send(new CreateRoomRequest(settings, true));
		}
	}
In SmartFoxServer, a Room is where users are grouped to be able to interact with each other. Whenever a user generates an event (for example sending a public message or setting their own User Variables), this is broadcasted to all users who joined that Room. In case a Room represents a large virtual space, this can lead to a great waste of resources because usually the user just "sees" a small portion of the whole space and often is not actually affected by events occurring in a different portion of the virtual world.
The MMORoom is a special type of Room aimed at developing Massive Multiplayer Online (MMO) games. The main difference with respect to a regular Room is that each player exclusively receives events from users (and other entities — which are outside the scope of this tutorial) within their Area of Interest (AoI in short), thus limiting the amount of data exchanged in the Room. In turn, the MMORoom requires that all users declare their own position in the virtual 3D space representing the MMORoom itself.
This approach allows to build extremely large environments that can be mapped to a single MMORoom, and host thousands of players without causing slowdowns or excessive network usage. In fact the server takes care of all the details, calculating which client should receive which events according to its position in the virtual space, and keeping everyone synchronized.
The configuration of the Room is set through the MMORoomSettings class. Other then the predefined name, we set the MaxUsers property to 100, which is more than enough for this small-scale example. Anyway you are free to experiment with thousands of users or NPCs, provided that you also enlarge the map in the Unity scene so that more players have space to walk around.
The DefaultAOI parameter is the pivotal setting that determines how far around the player events will be detected. Considering that the map extends 200 units on the X and Z axis (from -100 to 100), we chose a size of 25 units for the X and Z axis as the AoI, and 10 units for the Y axis (to cover altitude differences in the terrain).
Keep in mind that when we set the size of the AoI along one axis we mean in any one direction: in other words 25 units on the X axis mean 25 on the left side and 25 on the right side of the avatar, for a total of 50 units around the player.
We also define the lowest and highest coordinates available in our virtual space to make sure that we don't exceed the size of the map designed in Unity.
Finally we attach the Java Extension to the MMORoom, which helps demonstrating the MMORoom's features: in fact you will see the NPCs move around and appear or disappear when they respectively enter or leave the player's AoI.
» Enter the game
Whether an existing Room is joined, or a Room is created and then automatically joined (as controlled by the second parameter passed to the CreateRoomRequest instance), the ROOM_JOIN event is received by the client and its handler switches the active Unity scene from Login to Game.
	private void OnRoomJoin(BaseEvent evt)
	{
		// Go to main game scene
		SceneManager.LoadScene("Game");
	}
When the scene is loaded, the Start() method of the GameSceneController class gets a reference to the SmartFox client instance, adds its own listeners for the USER_VARIABLES_UPDATE and PROXIMITY_LIST_UPDATE events (required by the game logic) and spawns the avatar representing the player on the scene.
Additionally, the method adds a game object to the scene, showing the AoI around the player's avatar. This is made of four transparent vertical planes and it is resized to match the size of the AoI provided by the Room settings. The Update() method will take care of moving it so that it is always centered on the player. This object can be hidden by accessing the game settings by means of the related button in the UI.
	private void Start()
	{
		// Set a reference to the SmartFox client instance
		sfs = gm.GetSfsClient();

		// Hide modal panels
		HideModals();

		// Add event listeners
		AddSmartFoxListeners();

		// Set random model and material and spawn player model
		int numModel = UnityEngine.Random.Range(0, playerModels.Length);
		int numMaterial = UnityEngine.Random.Range(0, playerMaterials.Length);
		SpawnLocalPlayer(numModel, numMaterial);

		// Instantiate and set scale and position of game object representing the Area of Interest
		aoi = GameObject.Instantiate(aoiPrefab) as GameObject;
		Vec3D aoiSize = ((MMORoom)sfs.LastJoinedRoom).DefaultAOI;
		aoi.transform.localScale = new Vector3(aoiSize.FloatX * 2, 10, aoiSize.FloatZ * 2);
		aoi.transform.position = new Vector3(localPlayer.transform.position.x, -3, localPlayer.transform.position.z);

		// Update settings panel with the selected model and material
		settingsPanel.SetModelSelection(numModel);
		settingsPanel.SetMaterialSelection(numMaterial);
	}
The SpawnLocalPlayer() method is where the avatar representing the player is created using a random model (cube, sphere or pill) and material.
	private void SpawnLocalPlayer(int numModel, int numMaterial)
	{
		Vector3 pos;
		Quaternion rot;

		// In case a model already exists, get its position and rotation before spawning a new one
		// This occurs in case the current player selects a new model in the Settings panel
		if (localPlayer != null)
		{
			pos = localPlayer.transform.position;
			rot = localPlayer.transform.rotation;

			Camera.main.transform.parent = null;

			Destroy(localPlayer);
		}
		else
		{
			pos = new Vector3(0, 0, 0);
			rot = Quaternion.identity;

			pos.y = GetTerrainHeight(pos);
		}

		// Spawn local player model
		localPlayer = GameObject.Instantiate(playerModels[numModel]) as GameObject;
		localPlayer.transform.SetPositionAndRotation(pos, rot);

		// Assign starting material
		localPlayer.GetComponentInChildren().material = playerMaterials[numMaterial];

		// Since this is the local player, lets add a controller and set the camera
		localPlayerController = localPlayer.AddComponent();
		localPlayer.GetComponentInChildren().text = sfs.MySelf.Name;
		Camera.main.transform.parent = localPlayer.transform;

		// Set movement limits based on map limits set for the MMORoom
		Vec3D lowerMapLimits = ((MMORoom)sfs.LastJoinedRoom).LowerMapLimit;
		Vec3D higherMapLimits = ((MMORoom)sfs.LastJoinedRoom).HigherMapLimit;
		localPlayerController.SetLimits(lowerMapLimits.FloatX, lowerMapLimits.FloatZ, higherMapLimits.FloatX, higherMapLimits.FloatZ);

		// Save model, material and position in User Variables, causing other players
		// to be notified about the current player presence (see server-side Extension)
		List userVariables = new List();

		userVariables.Add(new SFSUserVariable("x", (double)localPlayer.transform.position.x));
		userVariables.Add(new SFSUserVariable("y", (double)localPlayer.transform.position.y));
		userVariables.Add(new SFSUserVariable("z", (double)localPlayer.transform.position.z));
		userVariables.Add(new SFSUserVariable("rot", (double)localPlayer.transform.rotation.eulerAngles.y));
		userVariables.Add(new SFSUserVariable("model", numModel));
		userVariables.Add(new SFSUserVariable("mat", numMaterial));

		// Send request
		sfs.Send(new SetUserVariablesRequest(userVariables));
	}
The first part of the code is quite straightforward: we instantiate the avatar model, set its material and assign the controller class responsible of collecting the user input to move and rotate the avatar. The map limits set for the MMORoom are also passed to the controller, to prevent the avatar from falling off the map edges.
» The User Variables
Next we need to set a number of User Variables to propagate the avatar settings and position to the other users in the MMORoom.
User Variables are one of the three server variable objects available in SmartFoxServer to store data to be shared among the clients of an application or game (the other two are Room Variables and Buddy Variables, which are out of the scope of this tutorial). As the word says, a server variable is stored on the server and broadcasted to the clients when a change occurs.
In a regular Room a User Variable is broadcasted to all the other users in the same Room where the owner of that variable is located. In our MMORoom instead, the update is not broadcasted to everybody: the system will first check the user position and then, based on the MMORoom's default AoI, will propagate the change to the client falling within that area only, which can then update the scene accordingly.
The User Variables we use in this example are:
- x, y, z — the position of the avatar divided into three separate variables, one for each axis;
- rot — the rotation of the avatar along the Y axis;
- model — an integer representing the shape of the avatar (cube, sphere, capsule);
- mat — an integer representing the material (actually just a color) of the avatar.
The User Variables are set by sending a dedicated request to the server.
NOTE
Using User Variables is not the most efficient and scalable way to send object positions over and over again, in particular in realtime games. A better but more complex approach involves sending updates using the UDP protocol to a server-side Extension, but this will be the topic of a more advanced example.
As a side note, the model and material of the player avatar can also be changed later by accessing the settings panel.

» The position in the MMORoom
In order to let the server know where players are located in the MMORoom and their respective visibility based on the AoI, we have to declare the position in the MMORoom by means of the dedicated MMO API.
We know what you are thinking now: Wait, this is a little confusing: we have a position written in User Variables and a position set in the MMO API... why?!? Well, we'll discuss this in a minute.
The trick of setting the user position in the MMORoom is accomplished via the server-side Room Extension, which listens to the User Variables update event and uses the the X and Z coordinates to tell the MMORoom where the player is located.
This could be accomplished on the client-side too (via the SetUserPosition request), but using an Extension allows to optimize the network usage (because we just send one request — SetUserVariablesRequest — instead of two — SetUserVariablesRequest and SetUserPositionRequest), which of course is fundamental in a realtime context.
On the server side, the UserVariablesUpdateHandler class is invoked every time a user in the Room updates the User Variables.
	private class UserVariablesUpdateHandler extends BaseServerEventHandler
	{
		@Override
		public void handleServerEvent(ISFSEvent event) throws SFSException
		{
			...

			@SuppressWarnings("unchecked")
			List<UserVariable> variables = (List<UserVariable>) event.getParameter(SFSEventParam.VARIABLES);
			User user = (User) event.getParameter(SFSEventParam.USER);

			// Make a map of the variables list
			Map<String, UserVariable> varMap = new HashMap<String, UserVariable>();

			for (UserVariable var : variables)
				varMap.put(var.getName(), var);

			if (varMap.containsKey("x") || varMap.containsKey("z"))
			{
				// Extract position from User Variables
				Vec3D pos = new Vec3D(
					varMap.get("x").getDoubleValue().floatValue(),
					0f,
					varMap.get("z").getDoubleValue().floatValue()
				);

				// Set position in proximity system
				mmoAPi.setUserPosition(user, pos, getParentRoom());
			}
		}
	}
When the event is fired, we put all the variables sent by the client into a map for convenience and check if a position update was sent. If the X or Z position of the player was changed we invoke the MMOApi.setUserPosition() method which is at the core of the MMORoom functioning.
This call tells the MMORoom where the player is located on the map in terms of 3D coordinates. This in turn allows the MMORoom to keep track of everybody and decide which users should receive which events.
NOTE
The Y coordinate is ignored in this example because on the server side the map is assumed to be flat, and height is evaluated on the client side only based on terrain elevation. In a real case scenario also Y coordinate should be taken into account.
It is important to note that the way you keep track of the user position and how the MMORoom keeps track of it are not the same and work independently of one another. From the developer's point of view, we need to keep track of the players' position and we are free to use any system that best suits our game design. Whether it is User Variables or custom values transmitted via Extension it doesn't matter. On the other hand the MMORoom also needs to be updated about each player position via the MMOApi.setUserPosition(). This is because the server can synchronize clients via their AoI only if it knows the position of every player.
The reason why these two tracking systems (the developer's and the server's one) are separate is because there is a large variety of games, all requiring different strategies. With this approach you are free to use any game logic that best works for your game and, separately, update the MMORoom state via its own API method.
PERFORMANCE NOTE
It is not necessary to call the setUserPosition() method on every move of the player. A player moving a few pixels on the left or right won't do any difference to the MMORoom. If you are sending tens of positional updates per second for each player, you may want to reduce the calls to setUserPosition() to a few per second. You can learn more about this topic in the additional resources found at the end of this article and in the next SpaceWar2 tutorial.
» The proximity list
The fundamental difference between a regular Room and an MMORoom lies in how the local user list is handled. In the latter, the client does not have a full view of all users joined in the Room; instead it receives a "Proximity User List" which represents a list of all users falling within the AoI range around the current player.
The client-side events USER_ENTER_ROOM and USER_EXIT_ROOM are no longer available inside an MMORoom; they are substituted by a single event called PROXIMITY_LIST_UPDATE, which provides a number of parameters:
- room: the MMORoom in which the event was originated
- addedUsers: the list of users who entered the AoI since last update
- removedUsers: the list of users who left the AoI since last update
- addedItems: the list of MMOItems which entered the AoI since last update
- removedItems: the list of MMOItems which left the AoI since last update
Whenever a player is enters or leaves the current user's AoI, an event of this type is received providing detailed information about what changed.
For the sake of this tutorial, we are only interested in the lists of added and removed users. MMOItem is an interesting advanced feature that is not discussed in this tutorial. You can learn more by consulting the links at the bottom of the page.
Let's now take a look at the OnProximityListUpdate() event handler.
	public void OnProximityListUpdate(BaseEvent evt)
	{
		var addedUsers = (List<User>)evt.Params["addedUsers"];
		var removedUsers = (List<User>)evt.Params["removedUsers"];

		// Handle new users
		foreach (User user in addedUsers)
		{
			// Get vertical position
			float h = GetTerrainHeight(new Vector3(user.AOIEntryPoint.FloatX, user.AOIEntryPoint.FloatY, user.AOIEntryPoint.FloatZ));

			// Spawn model representing remote player
			SpawnRemotePlayer(user,
				new Vector3(user.AOIEntryPoint.FloatX, h, user.AOIEntryPoint.FloatZ),
				Quaternion.Euler(0, (float)user.GetVariable("rot").GetDoubleValue(), 0)
			);
		}

		// Handle removed users
		foreach (User user in removedUsers)
		{
			if (remotePlayers.ContainsKey(user))
			{
				Destroy(remotePlayers[user]);
				remotePlayers.Remove(user);
			}
		}
	}
When we receive this notification we execute two simple tasks:
- loop through the list of added users and, for each one, create the corresponding avatar in the appropriate location on the scene
- go through the list of removed users and remove the related avatars from the scene
When adding new users we need to know at which coordinates we should position the avatar model. This information is provided via a special property added to the User class, called AoiEntryPoint, of type Vec3D.
» Player movement
As the local player moves around using the arrow keys on the keyboard, their avatar position and rotation change continuously. Transmitting the updated User Variables is done automatically as part of the Update() Unity callback in the scene's controller script.
	override protected void Update()
	{
		base.Update();

		// If the player model was already spawned, set its position by means of User Variables (if movement is dirty only)
		if (localPlayer != null && localPlayerController != null && localPlayerController.MovementDirty)
		{
			List<UserVariable> userVariables = new List<UserVariable>();
			userVariables.Add(new SFSUserVariable("x", (double)localPlayer.transform.position.x));
			userVariables.Add(new SFSUserVariable("y", (double)localPlayer.transform.position.y));
			userVariables.Add(new SFSUserVariable("z", (double)localPlayer.transform.position.z));
			userVariables.Add(new SFSUserVariable("rot", (double)localPlayer.transform.rotation.eulerAngles.y));

			sfs.Send(new SetUserVariablesRequest(userVariables));

			localPlayerController.MovementDirty = false;
		}

		// Make AoI game object follow player
		if (localPlayer != null)
			aoi.transform.position = localPlayer.transform.position;
	}
In order to avoid spamming the remote clients by sending updates even if the local user did not move or rotate their avatar, the PlayerController class uses the MovementDirty flag to track input key presses. When the flag is set to true, then position and rotation are transmitted.
NOTE
It is important to point out that this approach is good for local testing but it's not optimized for online playing. This way we are sending too many updates per second, and we could quickly saturate the internet connection. It is beyond the scope of this example to go into details on how to optimize the message rate. If you want to learn more about this topic you can check the SpaceWar2 tutorial.
» Updates from other players
Last but not least, we want to take a look at how the other players in the MMORoom are animated in the scene. The main event handler driving their motion is the OnUserVariablesUpdate() method.
	public void OnUserVariableUpdate(BaseEvent evt)
	{
		List<string> changedVars = (List<string>)evt.Params["changedVars"];
		SFSUser user = (SFSUser)evt.Params["user"];

		// Ignore all updates for the current player
		if (user == sfs.MySelf)
			return;

		// Check if the remote user changed their position or rotation
		if (changedVars.Contains("x") || changedVars.Contains("y") || changedVars.Contains("z") || changedVars.Contains("rot"))
		{
			if (remotePlayers.ContainsKey(user))
			{
				// Get vertical position
				float h = GetTerrainHeight(new Vector3((float)user.GetVariable("x").GetDoubleValue(), 1, (float)user.GetVariable("z").GetDoubleValue()));

				// Move the character to the new position using a simple interpolation
				remotePlayers[user].GetComponent<SimpleRemoteInterpolation>().SetTransform(
					new Vector3((float)user.GetVariable("x").GetDoubleValue(), h, (float)user.GetVariable("z").GetDoubleValue()),
					Quaternion.Euler(0, (float)user.GetVariable("rot").GetDoubleValue(), 0),
					true
				);
			}
		}

		// Check if the remote player selected a new model
		if (changedVars.Contains("model"))
		{
			// Spawn a new remote player model
			SpawnRemotePlayer(user, remotePlayers[user].transform.position, remotePlayers[user].transform.rotation);
		}

		// Check if the remote player selected a new material
		if (changedVars.Contains("mat"))
		{
			// Change material
			remotePlayers[user].GetComponentInChildren<Renderer>().material = playerMaterials[user.GetVariable("mat").GetIntValue()];
		}
	}
We first check who is the user sending the update. In case it's the local player, we don't need to do anything. Otherwise we proceed by checking if any of the three coordinates or rotation changed and update the avatar on screen.
Finally we check if the other avatar properties where modified and proceed to update them as well: the avatar's model and its material.
» The Non-Player Characters
As already mentioned before, the server-side Room Extension implemented by this example also takes care of generating a number of NPCs and moving them around to help visualizing the AoI behavior even if a single player joins the game.
In our example NPCs are created the first time a user enters the game and sets their User Variables, as the server-side UserVariablesUpdateHandler class shows. The reason why this is done at this stage and not, for example, when the MMORoom is initialized, is that we wanted to be able to access the MMORoom properties to limit the NPCs movement accordingly. Due to the internal behavior of SmartFoxServer, those properties are not yet available when the Room Extension's init() method is executed.
	private class UserVariablesUpdateHandler extends BaseServerEventHandler
	{
		@Override
		public void handleServerEvent(ISFSEvent event) throws SFSException
		{
			// If not yet done, start the simulation which creates and controls Non-Player Characters (NPC)
			// NOTE: we can't do it during the Extension initialization because MMORoom-specific settings are available yet
			if (!simulationStarted)
			{
				try
				{
					simulationStarted = true;

					// Create NPCs running around the map
					simulatePlayers();
				}
				catch (Exception e)
				{
					e.printStackTrace();
				}
			}

			...
		}
	}

	private void simulatePlayers() throws Exception
	{
		allNpcs = new LinkedList<User>();
		Random rnd = new Random();

		// Create NPCs
		for (int i = 0; i < NUM_NPC; i++)
			allNpcs.add(getApi().createNPC("NPC#" +i, getParentZone(), false));

		for (User user : allNpcs)
		{
			// Set random position within min & max map limits
			// Y coordinate is ignored as map is assumed to be flat; Y will be evaluated on the client side based on terrain elevation
			int rndX = rnd.nextInt(mmoRoom.getMapHigherLimit().intX() - mmoRoom.getMapLowerLimit().intX()) + mmoRoom.getMapLowerLimit().intX();
			int rndZ = rnd.nextInt(mmoRoom.getMapHigherLimit().intZ() - mmoRoom.getMapLowerLimit().intZ()) + mmoRoom.getMapLowerLimit().intZ();

			Vec3D rndPos = new Vec3D((float) rndX, 0, (float) rndZ);

			List<UserVariable> uVars = Arrays.asList
			(
				(UserVariable) new SFSUserVariable("x", (double) rndPos.floatX()),
				new SFSUserVariable("y", (double) rndPos.floatY()),
				new SFSUserVariable("z", (double) rndPos.floatZ()),
				new SFSUserVariable("rot", (double) rnd.nextInt(360)),
				new SFSUserVariable("model", rnd.nextInt(NUM_MODELS - 1)),
				new SFSUserVariable("mat", rnd.nextInt(NUM_MATERIALS - 1))
			);

			// Set random speed and save it in user properties, which are server-side data only
			NPCData data = new NPCData();
			data.xspeed = rnd.nextFloat() * 1.2f;
			data.zspeed = rnd.nextFloat() * 1.2f;

			user.setProperty("npcData", data);

			// Set NPC's User Variables
			getApi().setUserVariables(user, uVars);

			// Make NPC join the MMORoom
			getApi().joinRoom(user, mmoRoom);

			// Set NPC position in proximity system
			mmoAPi.setUserPosition(user, rndPos , mmoRoom);
		}

		// Start task making NPCs move around
		npcRunnerTask = SmartFoxServer.getInstance().getTaskScheduler().scheduleAtFixedRate(
			npcRunner,
			0, 							// 0 initial delay
			100, 						// run every 100ms
			TimeUnit.MILLISECONDS
		);
	}
The Extension's simulatePlayers() method creates the NPCs using the dedicated SmartFox API method, then: 1) a random position on the map and a random model and material are assigned to each NPC by means of User Variables; 2) a random speed is assigned to each NPC and saved in server-side-only user properties to be used later to control its movement; 3) the NPC joins the MMORoom and its position is set through the MMO API's setUserPosition() method already discussed for players positioning.
Finally the task responsible of moving the NPCs around is started (see the NPCRunner class).
You can now proceed to the next example in this Unity series to learn new features of SmartFoxServer.
» More resources
You can learn more about the SmartFoxServer concepts discussed in this example by consulting the following resources:
- Server Variables (User Variables and more)
- MMO Rooms
- Advanced MMO API techniques
- Java Extensions: an overview
- Writing the first Java Extension