

SFS2X Docs / GettingStarted / web-sockets
IMPORTANT NOTE
This document is outdated. Starting from SmartFoxServer 2X v2.13, Websockets support has been fully redesigned with the implementation of the standard binary protocol of SFS2X and integration with the internal web server.
Please read the introduction to the SmartFoxServer 2X protocol and the Protocol Cryptography document for Secure Websocket (WSS) setup.

» Using HTML5 and WebSockets
SmartFoxServer 2X provides support for HTML5 via WebSockets, the W3C standard for socket communication via native HTML5 applications, written in JavaScript. In conjunction with the latest web-browser technologies such as Canvas and WebGL this opens interesting opportunities to create sophisticated online games that don't require any browser plug-in.
» Preamble
WebSocket is an evolving project that is part of the new HTML5 set of standards for web communication.
From a purely client side perspective any application written for HTML5/WebSocket can be ported on any platform that runs an HTML5 compliant browser (e.g. computers with different OS, tablets and smartphones).
» Supported API features
The HTML5/JavaScript API provided with SmartFoxServer 2X covers all the standard API features, although some low level characteristics are not available. Below is a list of what is not supported or will be added later.
- Binary protocol: due to the high level of abstraction of the JavaScript language it is currently not possible to manipulate data at the byte level. The current HTML5 API employs JSON serialization, offering an efficient way to encode SFS2X objects.
- BlueBox: the firewall-traversal system is not available for HTML5 clients. In order to maximize the client connectivity it is advisable to configure the WebSocket engine to run on HTTP ports such as 80, 443 or 8080.
- HRC+: the SFS2X reconnection system is currently not supported by HTML5 clients.
» Secure Websockets (WSS)
Since SmartFoxServer 2X we have added support for the WSS protocol which adds the SSL/TLS layer on top of the standard websocket protocol.
» Setting up secure websockets
Via the AdminTool > ServerSettings panel it is possible to configure the TCP ports used by both standard websockets and secure websockets. You can see the default settings below.
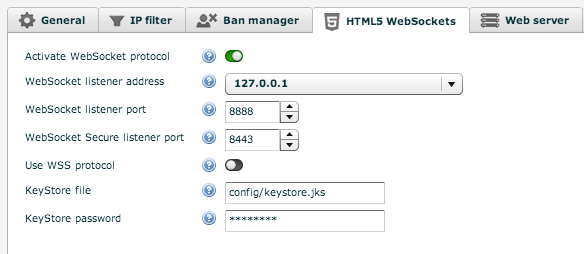
In order to activate the WSS protocol we need to toggle the Use WSS protocol switch and bind the websocket listener to our server's IP address.
It is important to note that any application communicating via SSL/TLS requires a signed security certificate. SmartFoxServer 2X provides a self-signed certificate out of the box that can be useful to test local applications but it won't work for a production server.
» Testing with a self-signed certificate
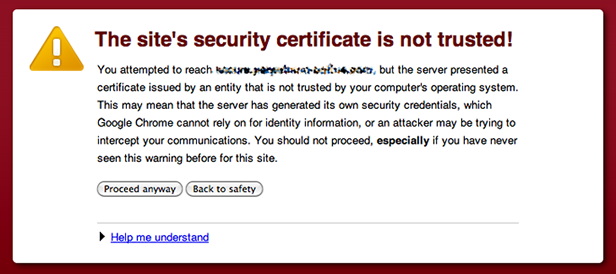
If you are familiar with the HTTPS protocol you may have seen a screen like the one below on several occasions. This is the browser warning us that the HTTPS website we are loading doesn't provide a certificate that is signed by a trusted Certification Authority (CA), therefore the security level of the website cannot be trusted..
The same concept applies for the WSS protocol with the only exception that the browser will not show you a friendly warning screen. Instead it will just prevent the connection to happen.
How can we test locally with a self-signed certificate if the browser doesn't accept it?
The solution is to instruct the browser that the test address we're going to use for our testing is safe and should be trusted. To do so we need to point our browser to https://<server-ip>:<port> where:
- <server-ip> is the test server IP address
- <port> is the WSS port number
The browser will show a warning page similar to the one shown here and we can click on the "Proceed anyways" (or equivalent) button to instruct the browser that the website can be trusted.
Now the secure websocket connection will be allowed and we can test our WSS application locally. Some browsers will also allow you to remember the the "manually trusted" URL so that we don't need to repeat this process every time we close and open the browser again.
» Running in production with a trusted certificate
In order to run SmartFoxServer 2X via WSS in a production environment we will need an SSL certificate signed by a trusted CA such as Symantec, Thawte, CACert etc...
To learn more about Certificate Authorities we recommend reading these external resources:
The standard procedure required to acquire and utilize a trusted certificate is not specific to SmartFoxServer. It uses the default JDK security API. These are the essential steps to set up the keystore file with your certificate:
-
Create a new keystore. Example:
keytool -genkey -alias server -keyalg RSA -keysize 2048 -keystore your_site_name.keystore
-
Create a Certificate Signing Request (CSR) from your keystore:
keytool -certreq -alias server -file csr.txt -keystore your_site_name.jks
The generated text file will be used to order the certificate from the CA. -
Import the obtained certificate file (.p7b) into your keystore file:
keytool -import -trustcacerts -alias server -file cert_file.p7b -keystore your_site_name.jks
- Copy the keystore file under the SFS2X/config/ folder and tell the server to load it from the AdminTool > ServerSetting > HTML5 Websockets panel.
We highly recommend consulting this StackOverflow article for more details.
» Supported browsers
Even though HTML5 and Websockets are supported by all modern internet browsers, some features may still be unsupported depending on older OS/browser versions. We recommend to check this comprehensive table to verify the support for your target platform: http://caniuse.com/websockets
Browsers with partial or no support for WebSockets or not mentioned on the page probably won't work correctly.
» Examples
An HTML5 examples package is available on the SmartFoxServer 2X download page. In order to run the examples make sure you activate the websocket support in the AdminTool's Server Configurator module.
» Documentation
In order to setup and use the HTML5/JavaScript API, please refer to the instructions on the Client API setup page.
Detailed jsDoc is also available here: the API classes and their methods/properties are fully described, together with usage examples.